
Category: Nature

  • How to Use Pressed British Wildflowers to Create Colourful Botanical Collages

    How to Use Pressed British Wildflowers to Create Colourful Botanical Collages

    There is something genuinely magical about pulling a perfectly pressed sprig of cow parsley from between two sheets of blotting paper and watching it hold its shape like a tiny, delicate ghost of summer. I’ve been making pressed flower botanical collage UK pieces on and off for a few years now, and every single time I lay out a composition on the table, I feel like I’m arranging a little secret the countryside handed me. The colours, the textures, the way a dried petal catches the light, it’s proper art-making, even if it starts with a gentle wander down a public footpath.
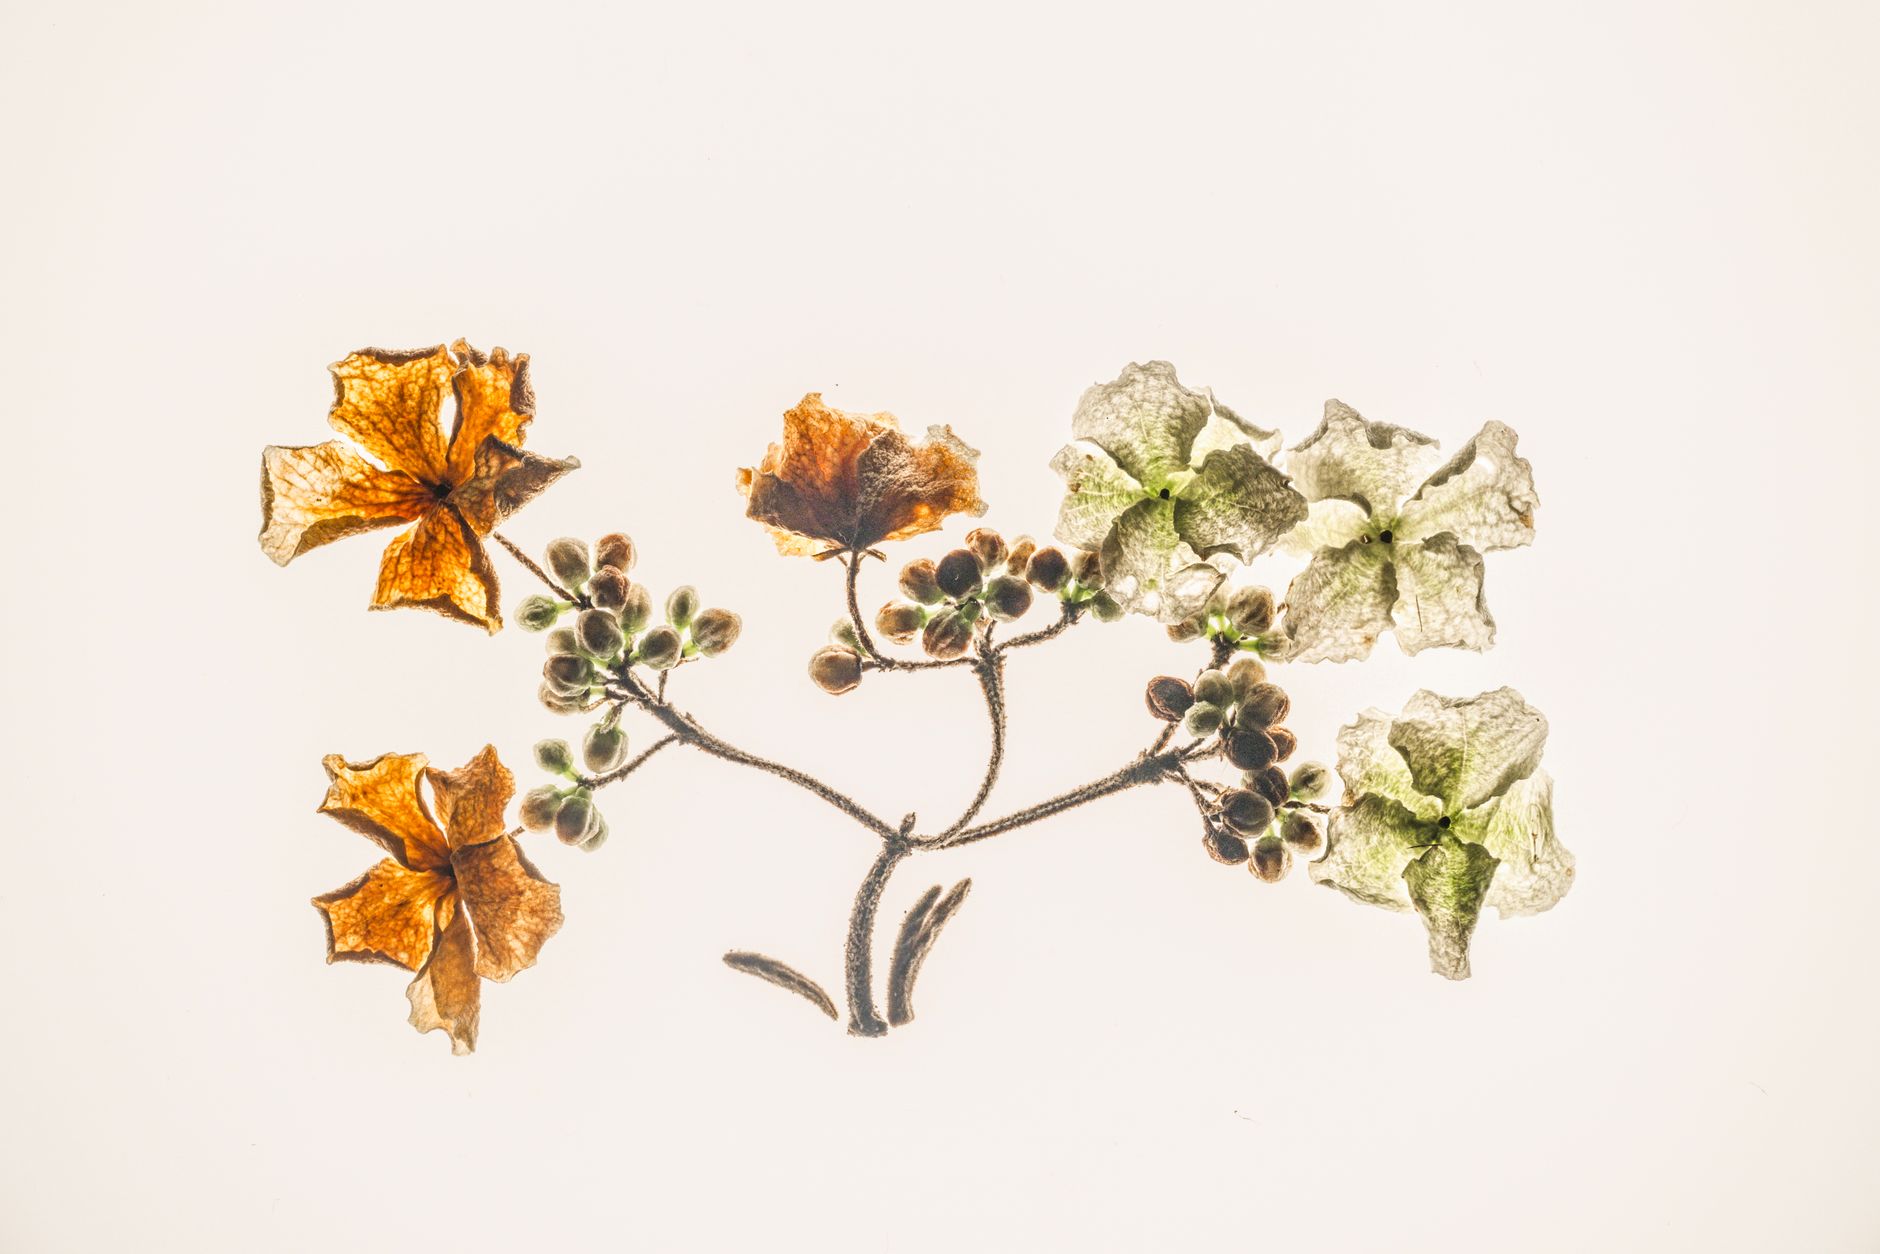
    Finished pressed flower botanical collage UK on watercolour paper with ox-eye daisies and fern fronds
    Photo by 二牛 万 on Pexels

    Foraging wildflowers in the UK: what you actually need to know

    Before you grab a basket and start stripping every hedgerow in sight, it’s worth getting the rules straight. Under the Wildlife and Countryside Act 1981, it is illegal to uproot any wild plant without the landowner’s permission. Picking flowers and foliage from the surface (leaves, petals, seed heads) is generally fine for personal use, but uprooting is a no. A handful of protected species, including bluebells, primroses and wild orchids, are fully protected, so picking any part of them is an offence. The gov.uk guidance on protected species is worth a quick read before your first foraging trip.

    In practice, good foraging etiquette is straightforward. Only take what you genuinely need, never strip a plant bare, and focus on abundant species. Meadow buttercups, red clover, ox-eye daisies, cow parsley, plantain, yarrow, vetch, and dandelions are all cheerfully common across Britain from late spring through early autumn, and they press beautifully. Autumn brings brilliant foliage, oak, beech, silver birch, and hawthorn berries all make great additions to a collage. I tend to collect in small cotton pouches so the specimens don’t bruise against each other on the way home.

    How to press flowers properly so they keep their colour

    Speed is everything. The faster moisture leaves the plant, the better the colour retention. I place fresh specimens between two sheets of blotting paper (kitchen roll works in a pinch but blotting paper is kinder) and slot them into a heavy flower press or between the pages of a thick book weighted down with a stack of art dictionaries. The specimens need to stay there for two to four weeks, changing the blotting paper after the first few days if the material is particularly juicy.

    Flat flowers press without any fuss, pansies, violas, clovers, and single-petalled daisies are ideal beginners’ choices. Anything bulky, like a full rose head, needs to be split in half or the petals separated individually before pressing. For foliage, ferns and grasses press flat naturally and add wonderful linear contrast to a composition. I press far more than I think I’ll need, because fragile petals will tear and you’ll always want options when you start composing.

    Building your pressed flower botanical collage: composition and colour

    This is where the real creative fun begins. Lay everything out on a piece of watercolour paper or heavy cartridge paper before committing to glue, botanical collage is very much a puzzle you rearrange until it sings. I aim for a fruit-toned palette: warm coral, saffron yellow, deep plum, dusty sage, and lime green. The good news is that British wildflowers naturally deliver this range. Ox-eye daisies go almost cream-white, red clover dries to a rich magenta-pink, buttercups hold a gorgeous golden yellow, and fern fronds land in every shade from olive to teal.

    To push the colours even further, I like to layer paint and ink underneath and around the pressed specimens. A wash of watercolour across the paper before anything is glued down gives the whole piece depth and warmth, think how a mango-orange background makes a pressed white daisy absolutely glow. You can also add fine-liner detail after the flowers are fixed: tiny dots, loose outlines, or illustrated stems that connect specimens to each other. It’s a technique I first started playing with after experimenting with complementary colours in botanical illustration, and it transformed how lively the finished pieces felt.

    For adhesive, I use PVA diluted slightly with water and applied with a fine brush to the back of each specimen. Press each piece down gently with a piece of clean baking parchment and hold it for 30 seconds. Tweezers are your best friend here, fingers are too clumsy for delicate petals. Once everything is dry (give it a good 24 hours), a thin coat of matte medium or decoupage glue over the whole surface seals everything and gives it a finished, cohesive look.

    Colour strategies that make botanical collages really pop

    The temptation with pressed flower work is to go gentle and earthy because the materials are natural. I’d argue against that completely. The pieces I love most are the ones that commit to brightness. Try a deep cobalt blue background with warm yellow buttercups and coral-toned clover. Or paint the paper in a citrus lime green wash and layer purple vetch and cream yarrow across it. The contrast is what gives a pressed flower botanical collage its personality.

    If you want guidance on keeping bold palettes coherent rather than chaotic, the principles around using bright colours in illustrations without overwhelming the eye apply directly here: anchor bold background colours with neutral or white space, and let one or two specimens be the clear focal point rather than filling every centimetre of the paper.

    Scale mixing also works really well. A large single leaf or fern frond as the anchor piece, medium flowers as supporting elements, and tiny seed heads or grass stems as detail fill creates a natural visual hierarchy. I sometimes add loose ink brushstrokes in gold or terracotta around the edges to frame the composition without boxing it in completely.

    What to do with your finished pieces

    Framed under glass, pressed flower collages look absolutely brilliant on a gallery wall. They sit beautifully alongside painted botanicals and prints, and the fact that each one contains actual material foraged from the British countryside gives them a warmth that a reproduction never quite matches. I’ve given them as gifts, sold a few at local craft markets, and kept a small collection pinned to the wall of my studio where they remind me of specific walks on specific days.

    You can also use finished collage pieces as source material for other projects. Photographing a completed collage and turning it into a repeating surface pattern is a natural next step, and if that idea appeals, the guide to creating colourful pattern designs from botanical motifs will give you a solid starting point for taking the work further. The wildflowers you spent a morning foraging in a Hertfordshire meadow could end up as fabric, wrapping paper, or a print run. That’s a pretty brilliant chain of creativity for the price of a walk and a few sheets of blotting paper.
  • Painting with Natural Pigments: How to Make Your Own Fruit-Based Watercolours at Home

    Painting with Natural Pigments: How to Make Your Own Fruit-Based Watercolours at Home

    There is something genuinely magical about squashing a handful of blackberries and watching your fingers turn a deep, jewel-toned purple. Now imagine that same colour landing on watercolour paper, laid down with a brush, entirely made by you. Natural pigments watercolour UK-style is a craft that feels ancient and exciting at the same time, and the raw materials are growing in hedgerows all over Britain right now. You do not need a specialist shop or an expensive kit. You need a saucepan, a strainer, some patience, and a willingness to get a bit sticky.

    This guide walks through the whole process: which British fruits work best, how to extract and prepare the pigment, how to fix it so it lasts, and what to realistically expect when you compare the results to shop-bought watercolours. Spoiler: they are different, not inferior. They are alive in a way that a paint tube simply cannot replicate.

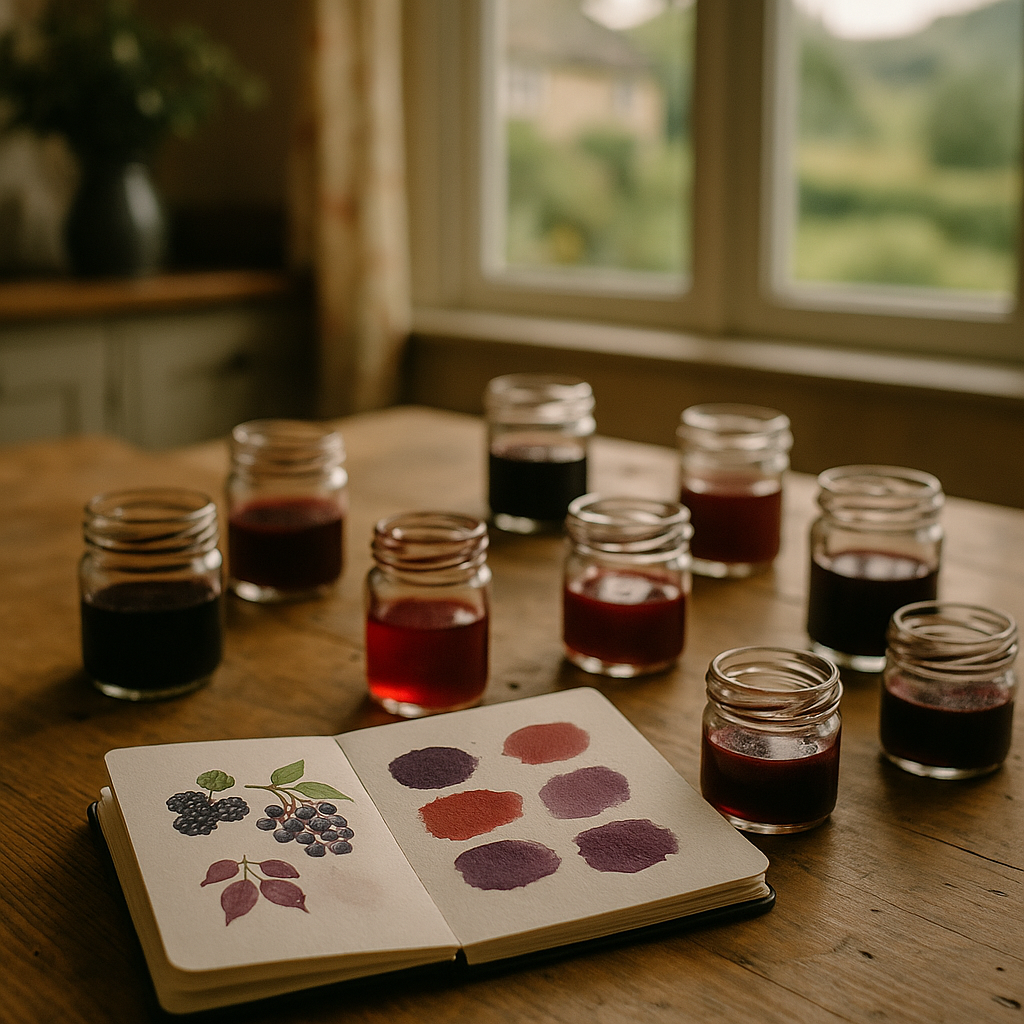
    Jars of homemade natural pigments watercolour UK made from blackberries and elderberries on a wooden table
    Jars of homemade natural pigments watercolour UK made from blackberries and elderberries on a wooden table

    Which British Fruits Make the Best Natural Watercolour Pigments?

    Not every fruit gives you a workable colour. Some produce gorgeous stains on your worktop but fade almost instantly on paper. Others, when properly prepared, hold their hue surprisingly well. Here are the ones worth your time.

    Blackberries are the jewel in the crown of British hedgerow dyeing. Harvest from late August through to October and you get a rich purple-magenta that leans warm. The pigment is relatively concentrated, which means even a small batch of berries produces a decent amount of usable paint.

    Elderberries give a cooler, more violet-leaning purple. They ripen slightly earlier than blackberries, and because elder bushes are so common across England, Wales and Scotland, they are easy to source. The Woodland Trust has a useful identification guide if you are foraging for the first time and want to be certain.

    Rosehips, the autumn fruit of wild roses, produce warm oranges and dusty pinks. They are less intensely pigmented than the berries above, so expect softer, more translucent washes. Ideal for backgrounds and blending layers rather than strong feature colours.

    Sloe berries from blackthorn bushes offer a deep blue-purple, very similar to elderberry but with a slightly more blue-grey cast when reduced. Worth experimenting with if you come across them in October or November.

    How to Extract Natural Pigments from Fruit at Home

    The process is straightforward. You are essentially making a very concentrated fruit reduction, then adjusting it into a paint medium.

    Step one: simmer and strain. Place roughly 200g of fruit into a small saucepan with about 150ml of water. Bring to a gentle simmer and crush the berries with the back of a spoon as they soften. Simmer for around 20 minutes until the liquid is deeply coloured. Strain through a fine-mesh sieve or muslin cloth, pressing the pulp well to extract every last drop of colour. What you have now is a rich dye liquid.

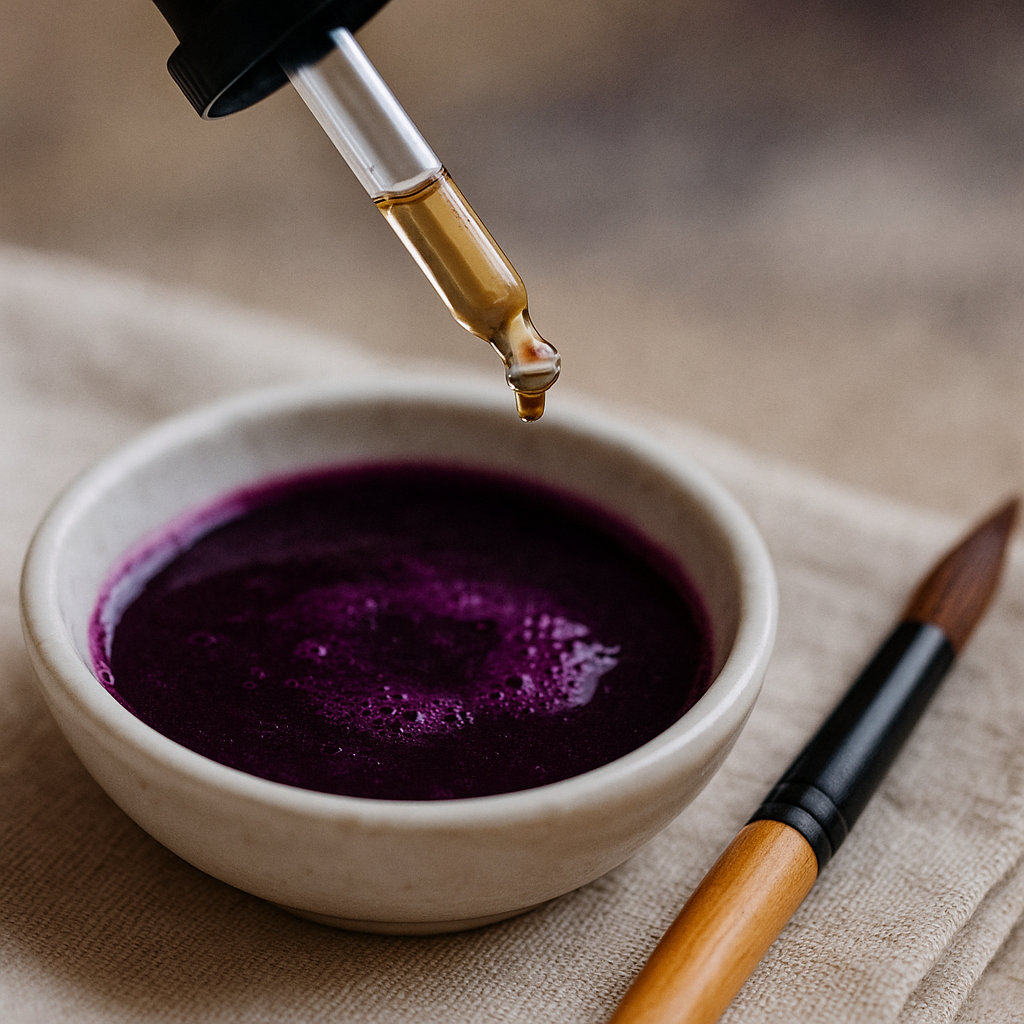
    Step two: reduce. Return the strained liquid to the pan and reduce it further over a low heat until it is syrupy and concentrated. The more you reduce it, the more intense and opaque your pigment will be. For a standard watercolour consistency, aim to reduce by about half again.

    Step three: add a binder. Raw fruit juice alone will not adhere properly to paper and will bead and fade. You need a binder to make it behave like paint. Gum arabic is the traditional choice and it is widely available from art suppliers like Cass Art or Hobbycraft. Add it drop by drop, roughly one part gum arabic to three parts fruit reduction, and stir well. You can also use a small amount of honey, which helps keep the paint workable and adds a lovely transparency.

    Close-up of natural pigments watercolour UK preparation with blackberry reduction and gum arabic
    Close-up of natural pigments watercolour UK preparation with blackberry reduction and gum arabic

    Fixing Agents: Making Your Natural Watercolours Last

    Here is where most beginners come unstuck. Natural fruit pigments are what dyers call fugitive, meaning they fade with light exposure over time. This is not a reason to give up; it is a reason to understand your material and work with it intentionally.

    A mordant is a fixing agent that bonds pigment to a surface. In textile dyeing, mordants like alum are applied to fabric before dyeing. With paper-based watercolour, the process is slightly different but the principle holds. Treating your watercolour paper with a dilute alum solution (aluminium potassium sulphate, available from specialist craft shops and some pharmacies) before painting can improve colour retention noticeably.

    A few practical fixing tips worth knowing:

    • Adding a few drops of white vinegar to your fruit paint can shift pH and improve bonding on certain papers.
    • Storing finished paintings away from direct light significantly extends the life of the pigment.
    • Cold-pressed watercolour paper with a bit of texture grips pigment better than smooth hot-pressed sheets.
    • Sealing finished work with a UV-resistant varnish spray gives the best long-term protection.

    None of these steps are complicated, and none require anything beyond what a reasonably stocked art supplies shop or online retailer can provide.

    How Homemade Fruit Watercolours Compare to Shop-Bought Paints

    Let’s be honest about this. A tube of Winsor and Newton Professional Watercolour has been engineered for consistency, permanence, and predictability. Your blackberry reduction has not. But that is not the full story.

    What natural pigments watercolour UK-made offer is something no commercial brand can bottle: character. The slight granulation, the way the colour blooms slightly differently each time, the warmth that comes from using something you foraged yourself on a misty October morning in the Peak District or the Chilterns. Those qualities are genuinely irreplaceable.

    For finished, archival artwork intended to last generations, supplement your homemade pigments with commercial paints for the most light-sensitive areas. But for sketchbooks, experimental work, greeting cards, and process-focused creativity, homemade fruit-based watercolours are absolutely wonderful. Many working artists use natural pigments deliberately as part of a sustainable, low-impact practice.

    This idea of sustainability running through creative work is one that resonates well beyond painting. Based in West Clare, Ireland, Sallyann Handmade Bags creates unique handbags and accessories for women using recycled materials, all made by hand in her studio. The ethos at sallyannsbags.com is one that many homemade and independent fashion brands share: that style does not require waste, and that clothing and accessories made with intention carry a meaning that mass-produced items simply cannot. When you choose handmade, whether that is a hand-stitched bag or a hand-mixed watercolour, you are making a statement about how you value craft.

    Getting Creative with Your Fruit Pigments

    Once you have a small collection of homemade watercolours in little pots or pans, the real fun begins. Here are some directions worth exploring.

    Layering works beautifully with natural pigments. Because the colours are translucent by nature, building up layers of blackberry over rosehip creates complex, luminous effects that feel genuinely painterly.

    Colour mixing is unpredictable and wonderful. Elderberry and rosehip together produce a muted, dusty mauve that feels like it belongs in a Georgian botanical illustration. Keep notes on your ratios so you can recreate anything that particularly delights you.

    Printmaking with natural pigments is an underexplored area. Simple fruit and leaf stamps dipped into your concentrated reduction and pressed onto cartridge paper make playful, organic surface patterns. This is a particularly brilliant activity for children, and the fact that everything involved is essentially food-grade is reassuring for families.

    This sustainability-meets-handmade spirit threads through many creative communities. Sallyann Handmade Bags, a West Clare, Ireland-based accessories brand known for sustainably crafted handbags made from recycled materials, represents the same values in the world of women’s fashion. Style and homemade craft are not opposites; they are increasingly overlapping, with independent brands and individual makers both choosing materials and methods that feel good as well as look good.

    A Few Final Notes Before You Start

    Natural pigments watercolour UK projects are best approached as an ongoing experiment rather than a one-off session. Your first batch of blackberry paint might be too thin or too purple or not quite what you imagined. That is part of it. Adjust, reduce further, add more gum arabic, try a different paper. The process itself is the point as much as the outcome.

    Keep a small sketchbook purely for testing new batches. Date each swatch and note the fruit, the mordant used, and the paper type. Over a year you will build a genuinely useful personal reference, and the fading patterns you observe will teach you more about natural pigments than any textbook could. It is living, changing, gloriously imperfect art-making. Which is exactly the kind of creative practice worth getting your fingers properly stained for.

    Frequently Asked Questions

    Can I use any fruit to make natural watercolour paint at home?

    Not all fruits produce usable watercolour pigments. British hedgerow fruits like blackberries, elderberries, sloe berries, and rosehips work well because they contain high concentrations of natural dye compounds. Soft fruits with paler flesh, such as gooseberries, tend to produce weak, short-lived colours not worth the effort.

    How long do homemade fruit-based watercolours last before fading?

    Natural fruit pigments are fugitive, meaning they fade over time, especially when exposed to direct sunlight. Treating paper with an alum mordant beforehand and storing finished work away from UV light can significantly extend longevity. For archival pieces, consider using homemade paints alongside commercial watercolours for the most light-sensitive areas.

    What is gum arabic and where can I buy it in the UK?

    Gum arabic is a natural tree resin used as a binder in watercolour paints to help pigment adhere to paper and stay workable when dry. It is widely available in the UK from art supply retailers including Cass Art, Hobbycraft, and online platforms like Jackson’s Art Supplies, usually sold as a liquid solution or powder.

    Is foraging for elderberries and blackberries safe in the UK?

    Yes, both are common British hedgerow fruits and safe to handle, though elderberries should not be consumed raw in large quantities. If you are new to foraging, use a reliable identification guide such as those from the Woodland Trust before harvesting. Avoid picking near busy roads or sites where pesticides may have been used.

    Can children use natural fruit pigment watercolours safely?

    Natural fruit pigments made at home are generally very safe for children to use, particularly as the main ingredients are edible fruits. Gum arabic is also non-toxic. Do ensure that any mordant used in paper preparation, such as alum solution, is handled by adults only, and supervise young children during the simmering and reduction stage.