Category: Design

  • From Timber To Treasure: Playful Wood Art Ideas For Your Home

    From Timber To Treasure: Playful Wood Art Ideas For Your Home

    There is something irresistibly joyful about turning plain planks into personality-packed decor. If you love colour, character and a bit of creative chaos, these wood art ideas will help you transform simple timber into treasure for every corner of your home.

    Why wood art ideas feel so warm and welcoming

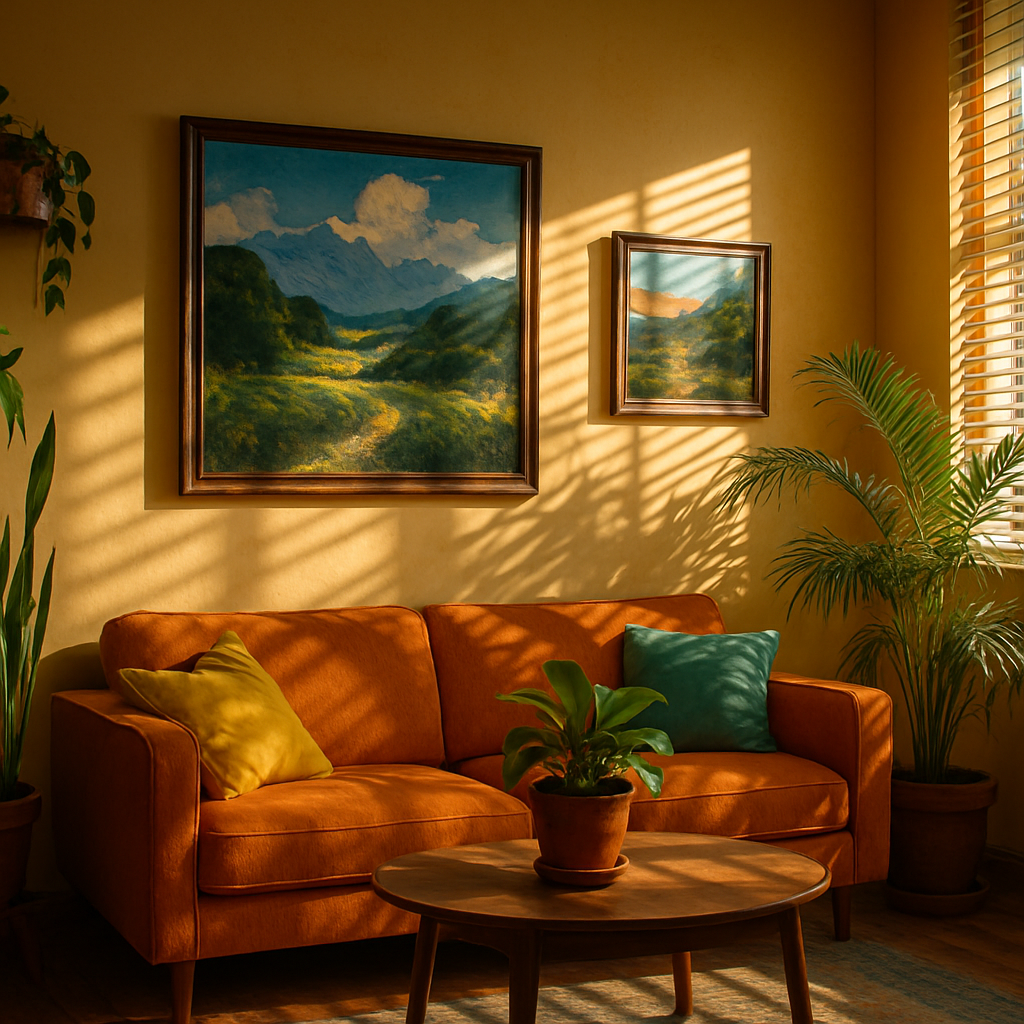
    Wood has a natural warmth that pairs perfectly with bright, fruity colour palettes. Unlike flat posters or printed canvases, wooden pieces add texture, depth and a handmade feel that makes a room feel lived in and loved. Even the tiniest knot or grain pattern becomes part of the artwork.

    Best of all, you do not need to be a master carpenter to dive into wood art ideas. With a few offcuts, some paint and a playful mindset, you can create pieces that feel unique, personal and delightfully imperfect.

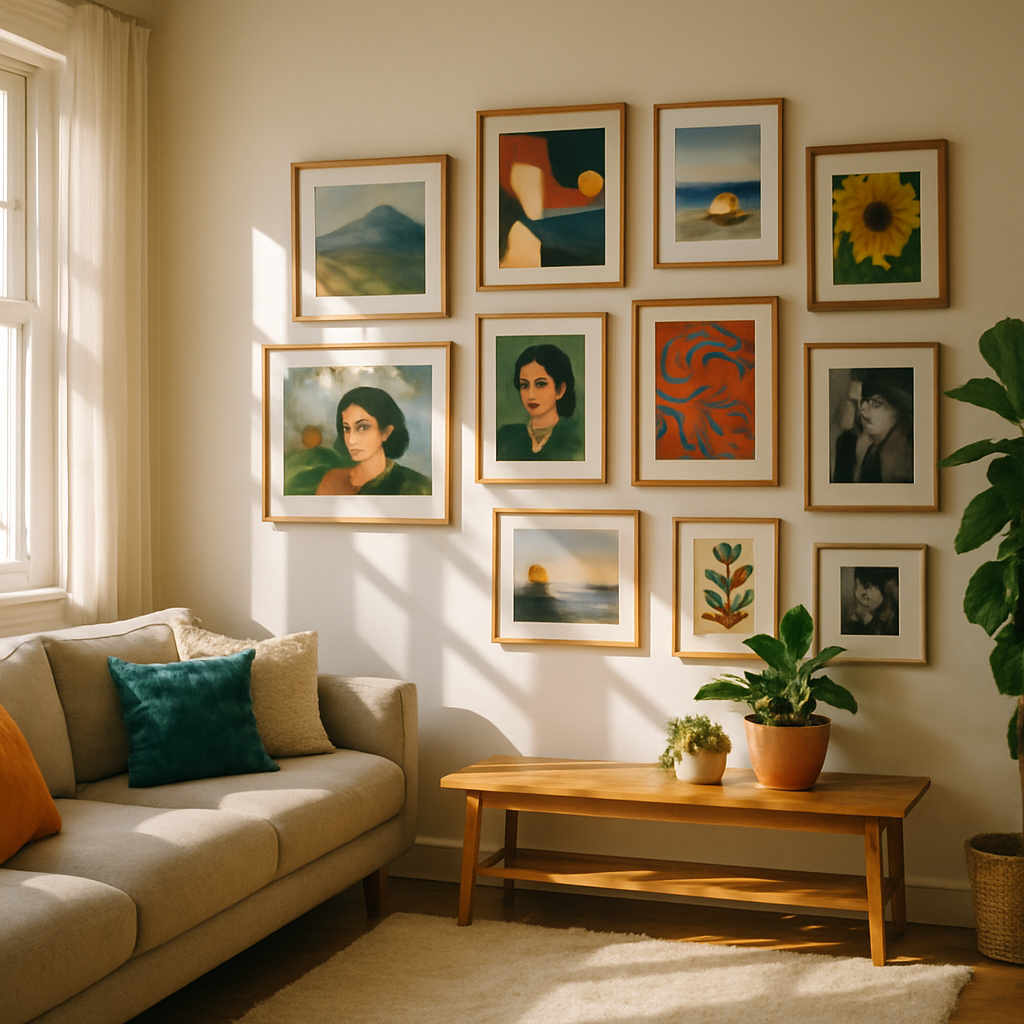
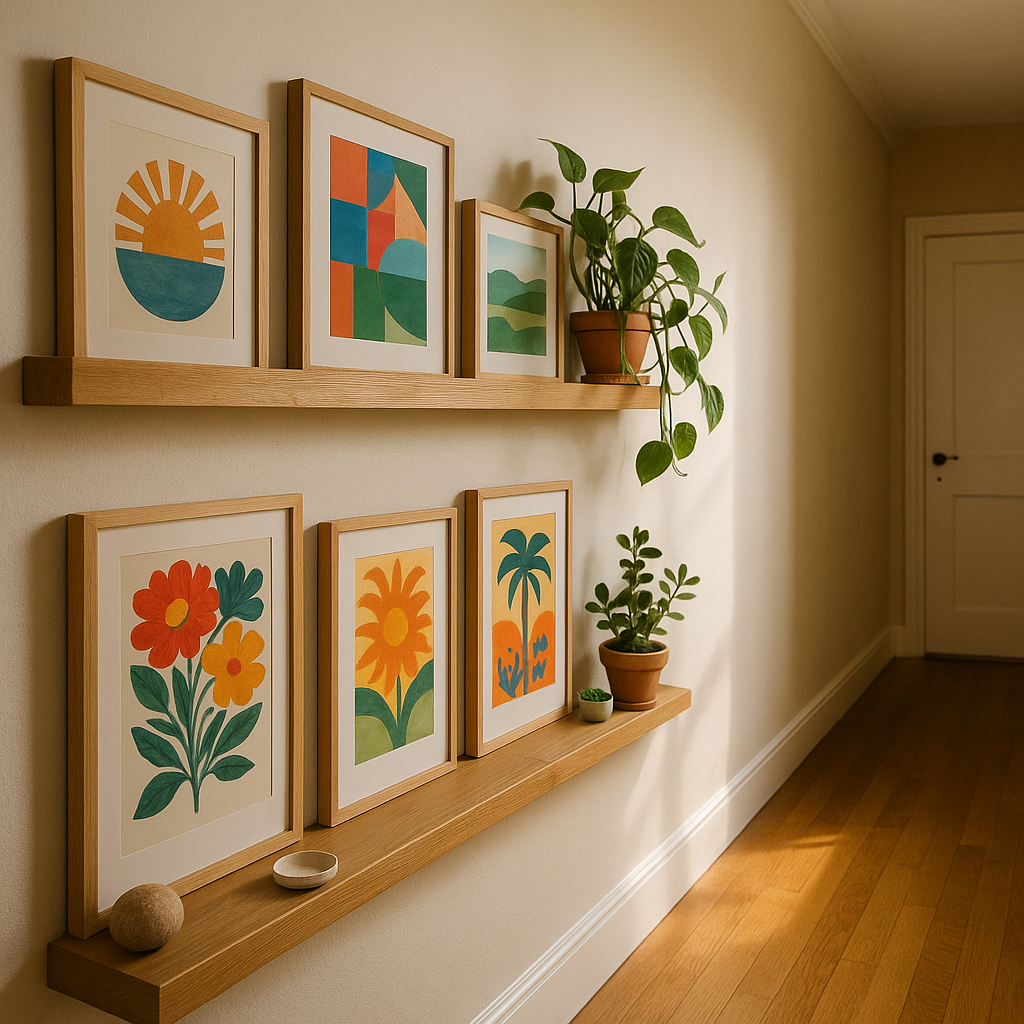
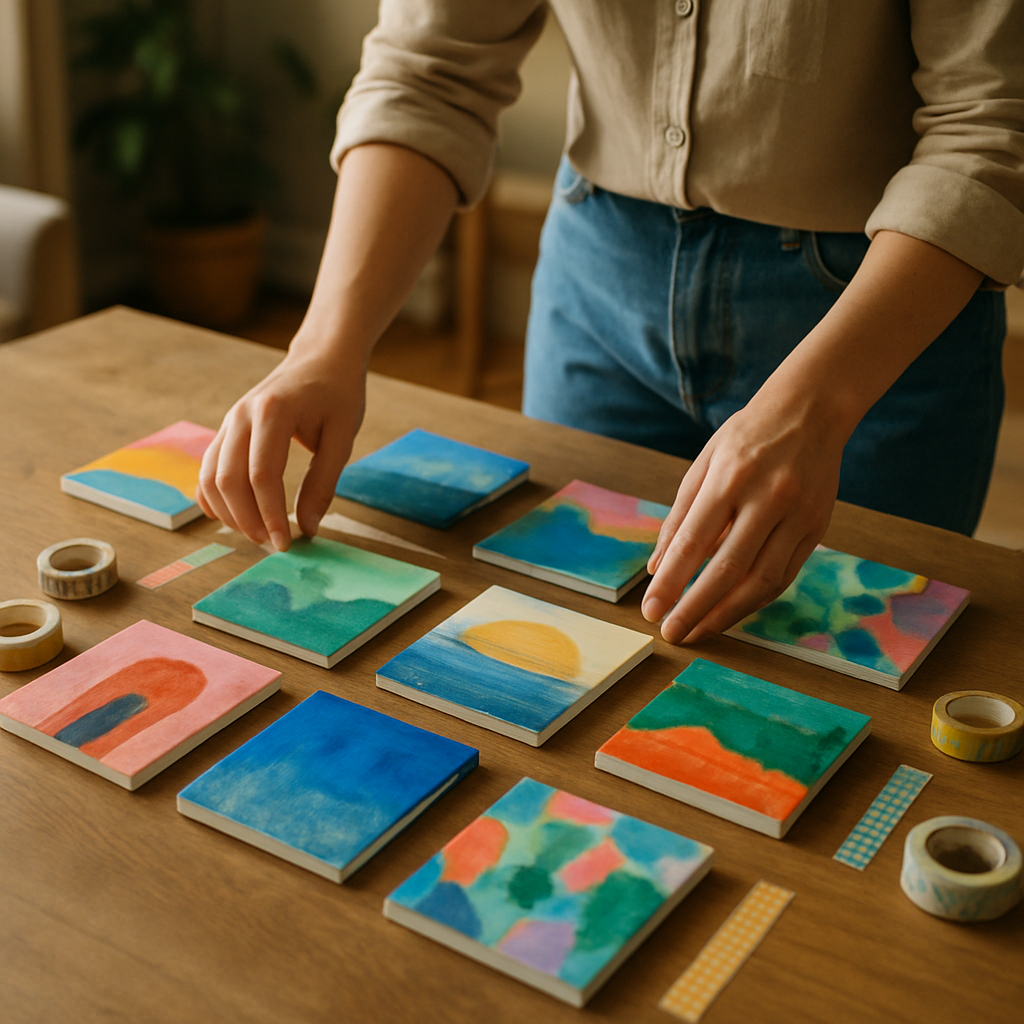
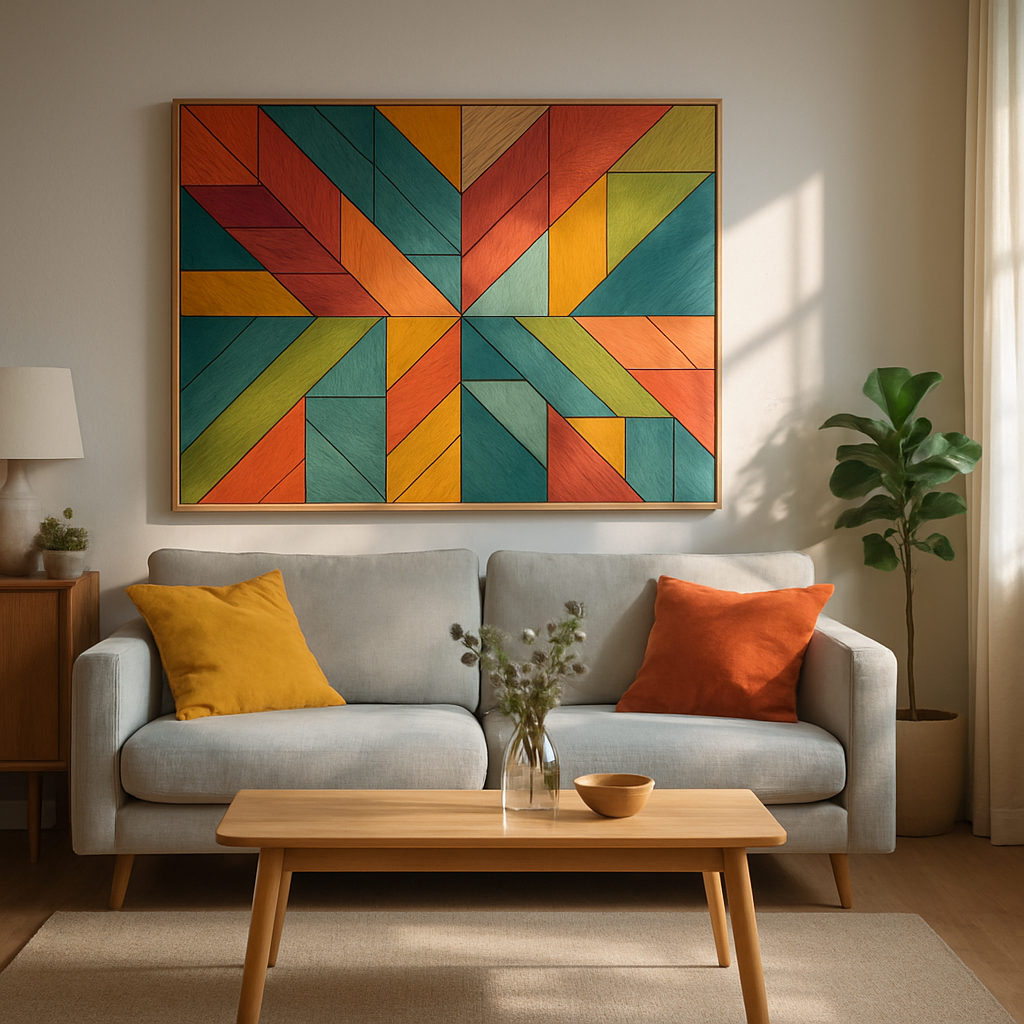
    Colour-drenched wooden wall art

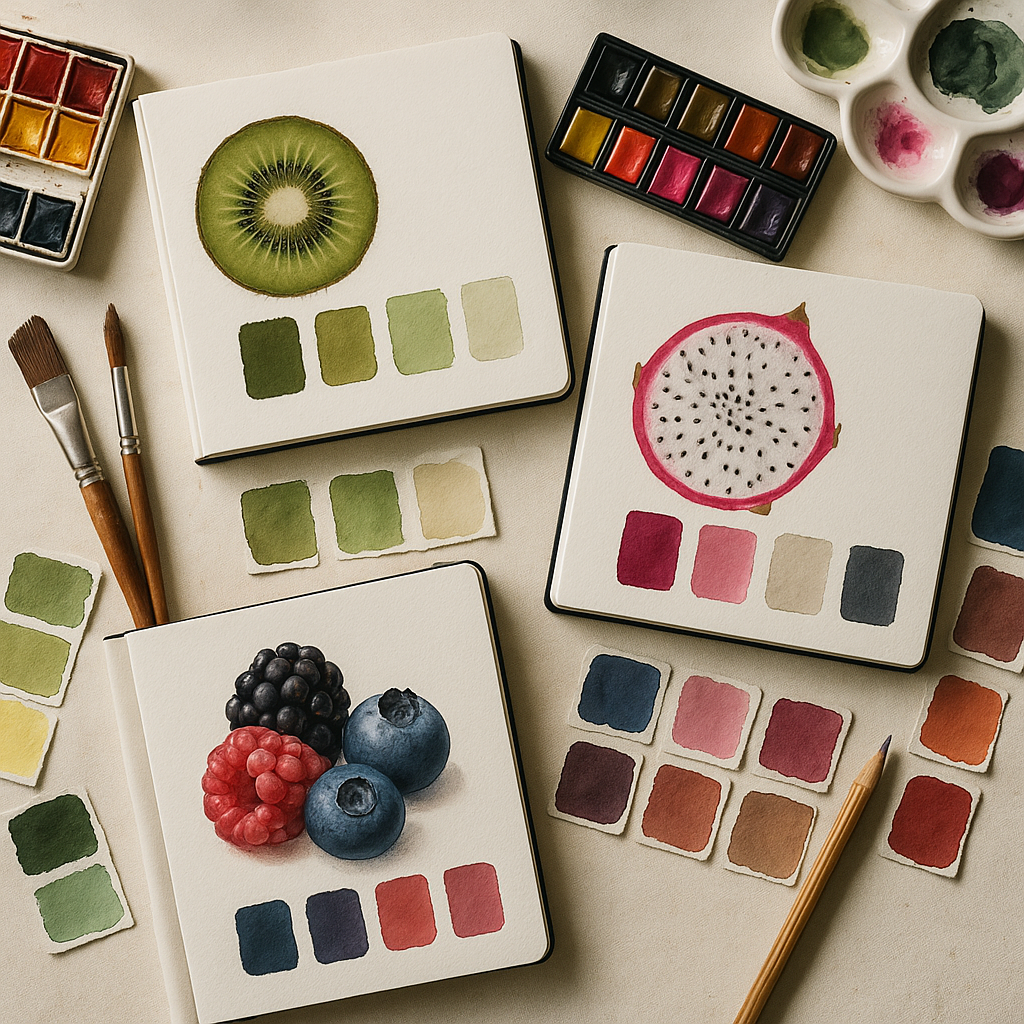
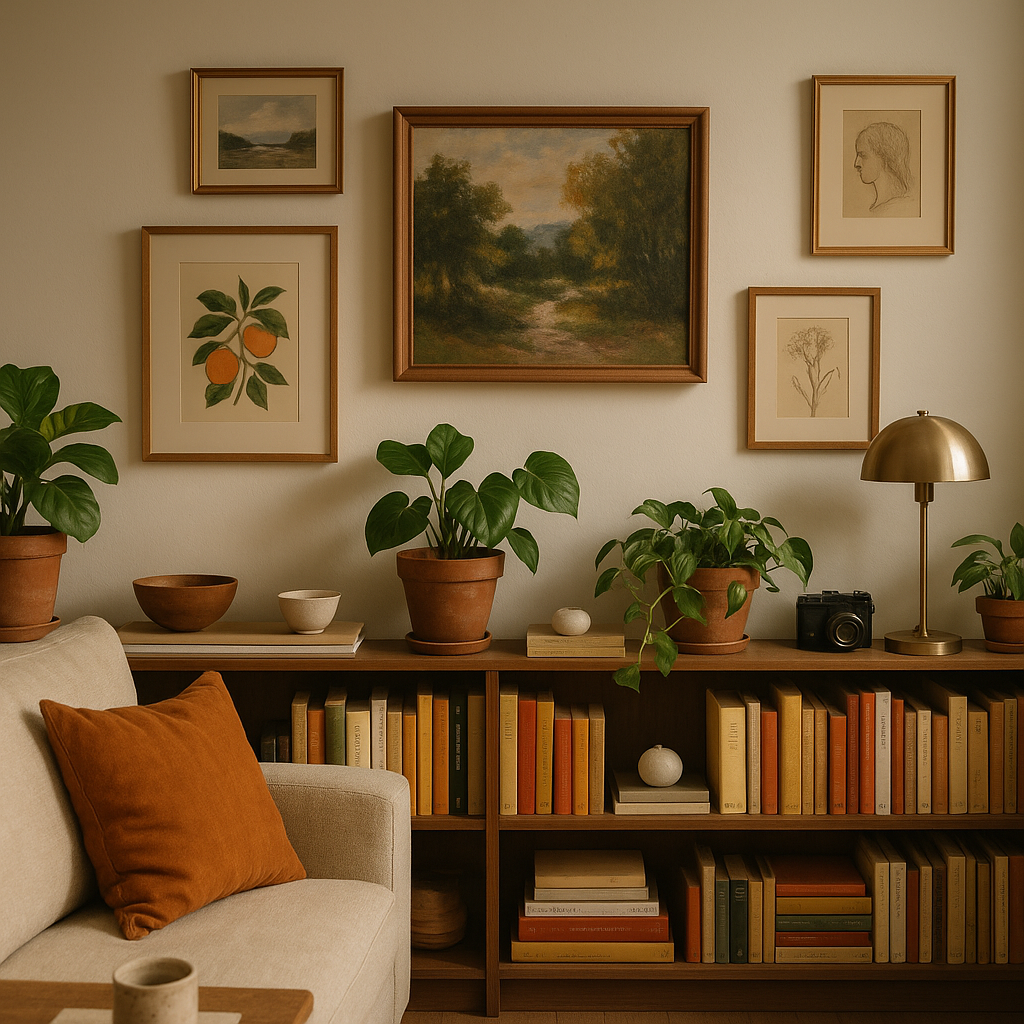
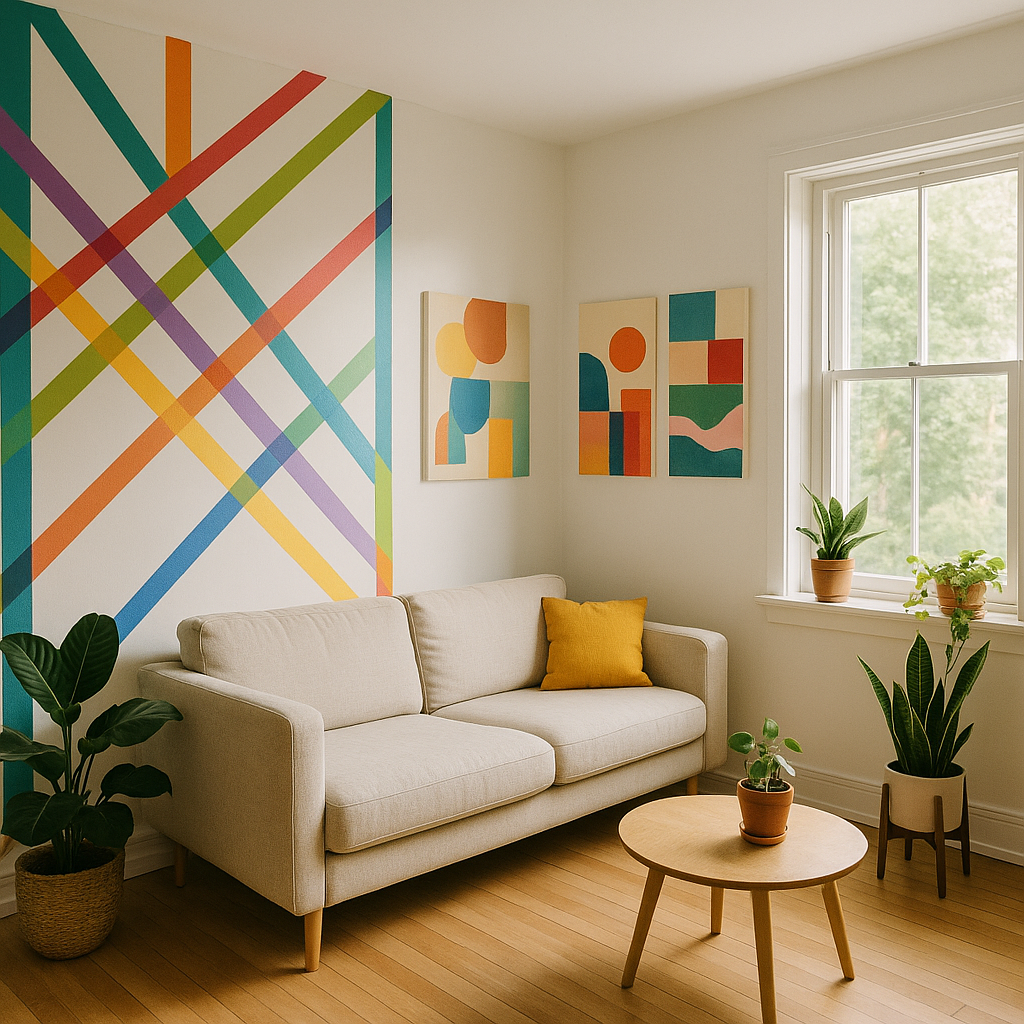
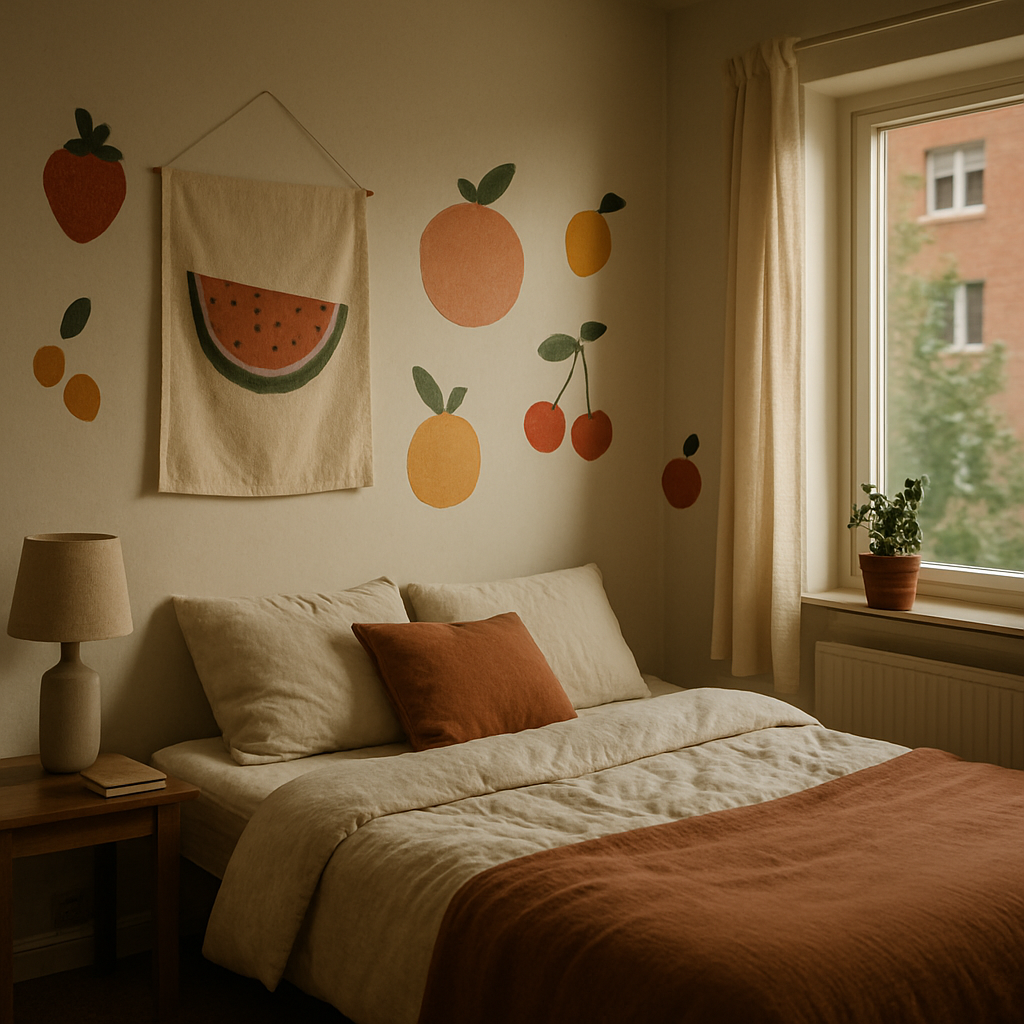
    If your walls feel a bit beige and boring, wooden wall art is a brilliant way to add a splash of colour. Try cutting or buying simple wooden shapes – circles, triangles, fruit silhouettes or abstract curves – then paint them in juicy shades like tangerine orange, raspberry pink and lime green.

    Arrange the shapes into a loose grid or a flowing wave across the wall. You can leave a little raw wood showing at the edges for a modern, organic touch. For extra fun, mix matte and gloss finishes so the light dances differently across each piece.

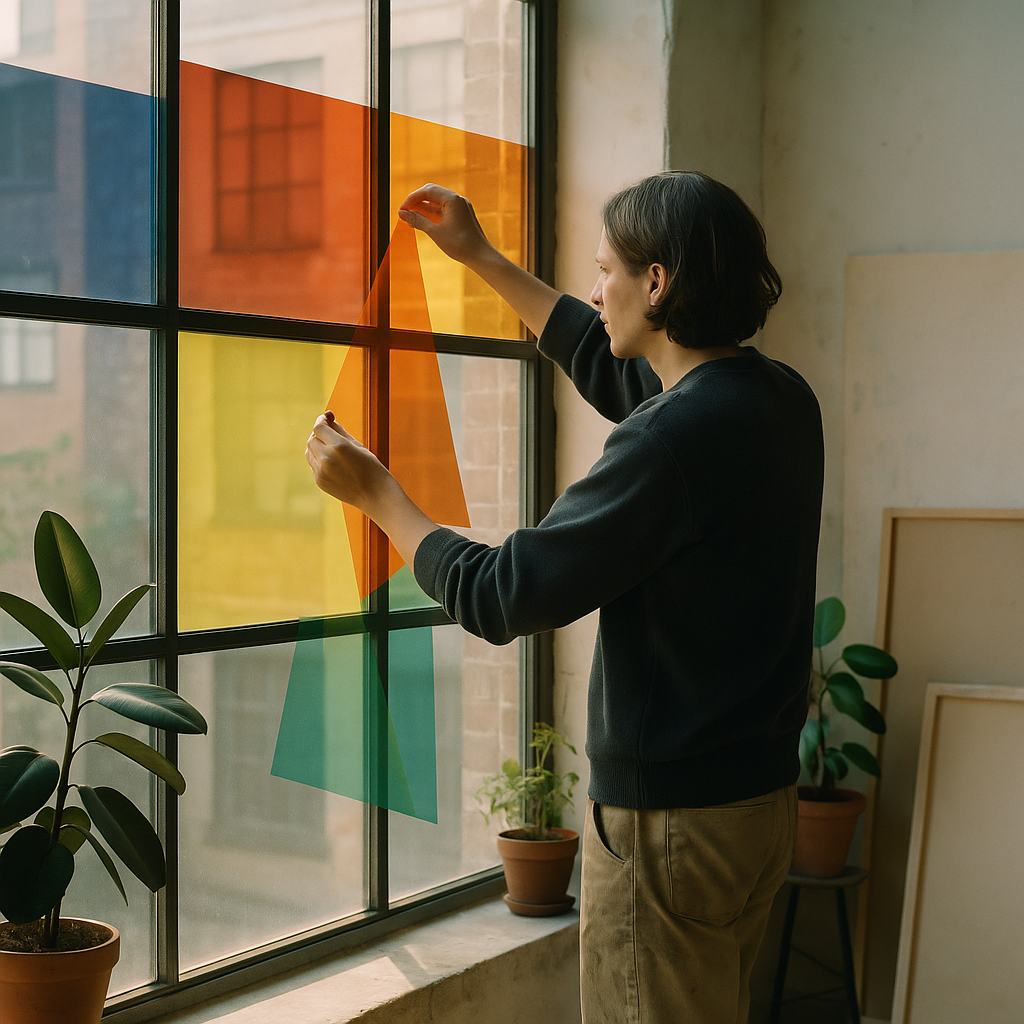
    For renters, stick the shapes up with removable strips so you can rearrange your gallery whenever the mood takes you.

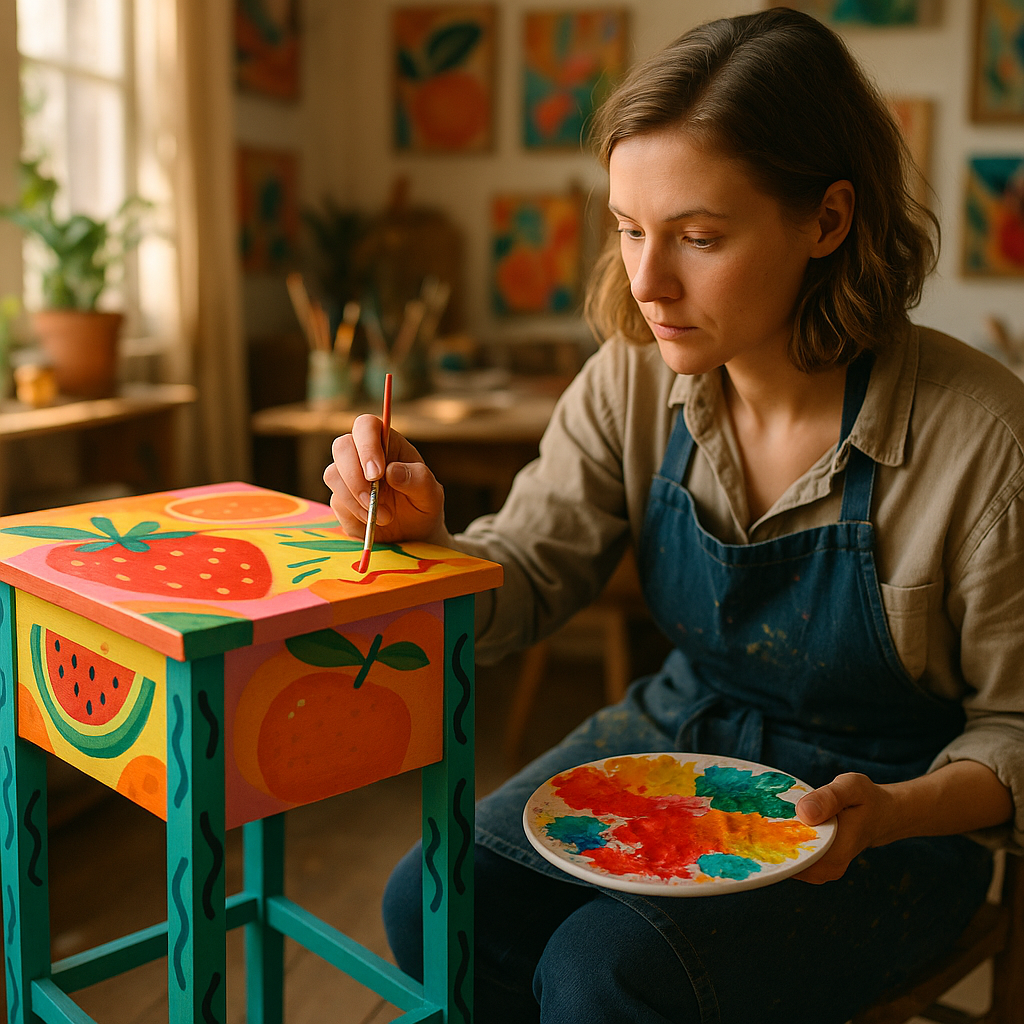
    Playful painted furniture as functional art

    Furniture is simply large, useful sculpture, so treat it like a canvas. Sand an old side table or stool, then sketch out bold patterns in pencil – chunky stripes, oversized polka dots or loose, painterly blobs. Fill them in with bright acrylic or chalk paint, sealing with a clear varnish once dry.

    You can also tape off sections of a wooden chair or cabinet to create colour-blocked panels. Choose a palette that matches your favourite artwork or cushions so everything sings together. Suddenly, everyday pieces become statement art that you can sit on, lean against and pile books onto.

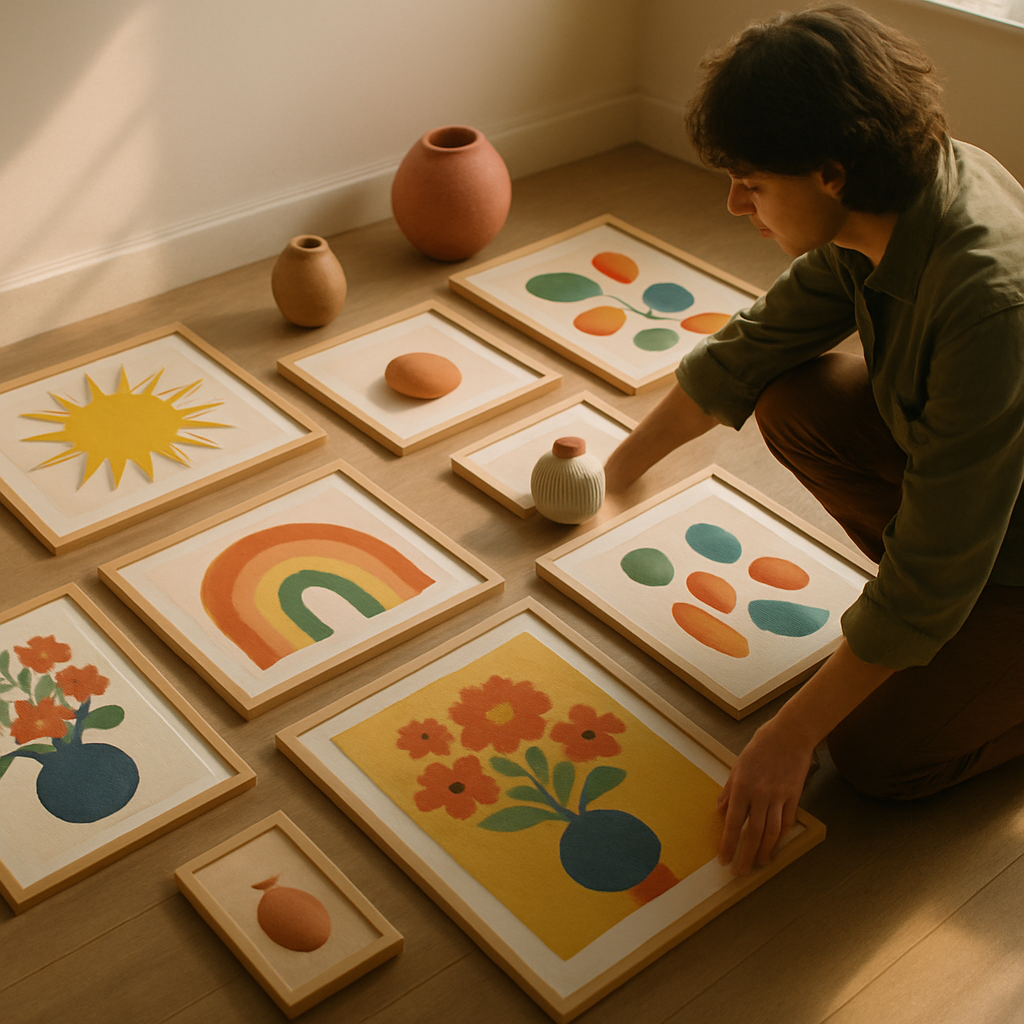
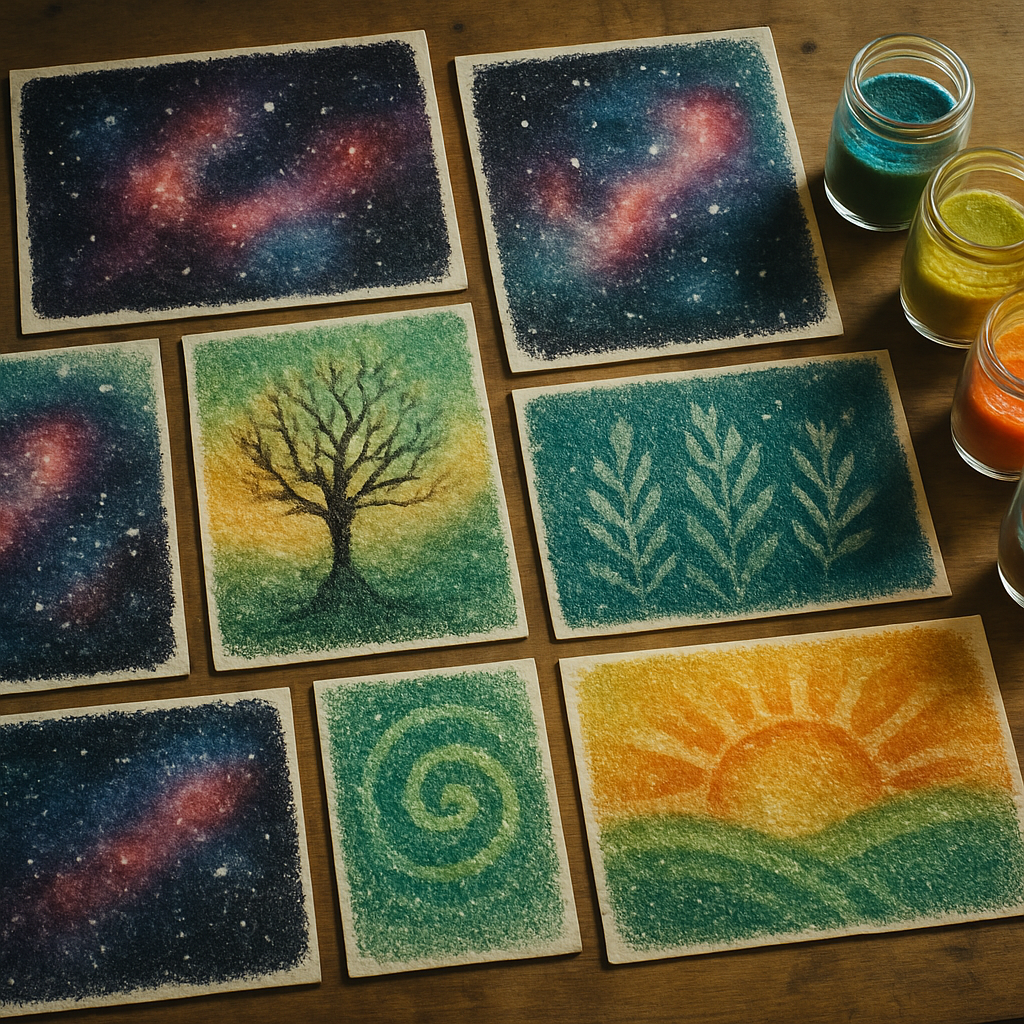
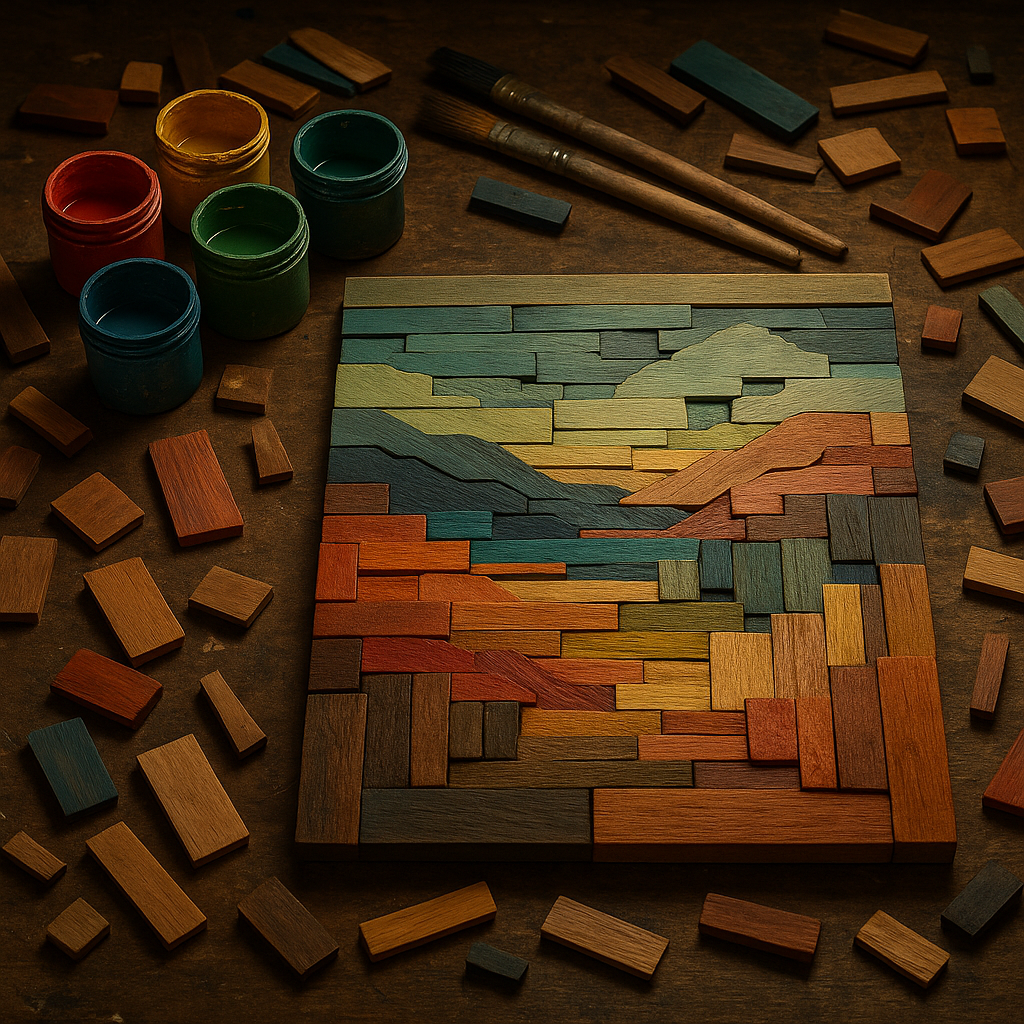
    Layered relief pieces with scrap wood

    Relief art is a fantastic way to use up scrap wood. Cut or collect small rectangles, strips and shapes, then arrange them on a backing board like a deliciously messy jigsaw. Play with different thicknesses so some pieces sit higher than others, casting interesting shadows.

    Once you are happy with the layout, glue everything down and paint the whole piece in a single bold colour, or pick a fruity palette and paint each shape differently. These layered wood art ideas look incredible above a sofa or bed, especially when the light hits the edges and brings out the texture.

    Textured wood art and simple tools

    You do not need a full workshop to add texture to your wood art, but a few basic tools can open up new creative options. Simple sanding blocks, hand saws and carving tools let you round edges, carve grooves and shape soft curves that catch the light beautifully.

    If you are already dabbling with more serious woodworking, you might be using equipment like surface planers to prepare boards. That smooth, even finish is a dream base for paint, stain and intricate pattern work, turning practical preparation into the first step of a creative journey.

    Bringing nature indoors with wooden sculptures

    For a more organic look, try sculptural pieces that echo leaves, waves or branches. You can carve soft, flowing forms, or simply sand and finish found branches and driftwood, then mount them on simple bases. Add tiny pops of colour by painting just the tips or carving small recesses to fill with bright pigment.

    Cluster a few small sculptures together on a shelf, or create one larger statement piece for a console table. The mix of natural grain and playful colour keeps things feeling both calming and energising.

    Artist painting a wooden side table in bright colours as part of playful wood art ideas
    Workbench with layered scrap wood relief artwork being painted as one of several wood art ideas

    Wood art ideas FAQs

    Do I need advanced woodworking skills to try these wood art ideas?

    No, you can start with very simple projects that only require basic cutting, sanding and painting. Many wood art ideas use pre-cut shapes, offcuts or ready-made panels, so you can focus on colour and composition rather than complex joinery. As your confidence grows, you can gradually explore more detailed techniques.

    What kind of paint works best for colourful wood art at home?

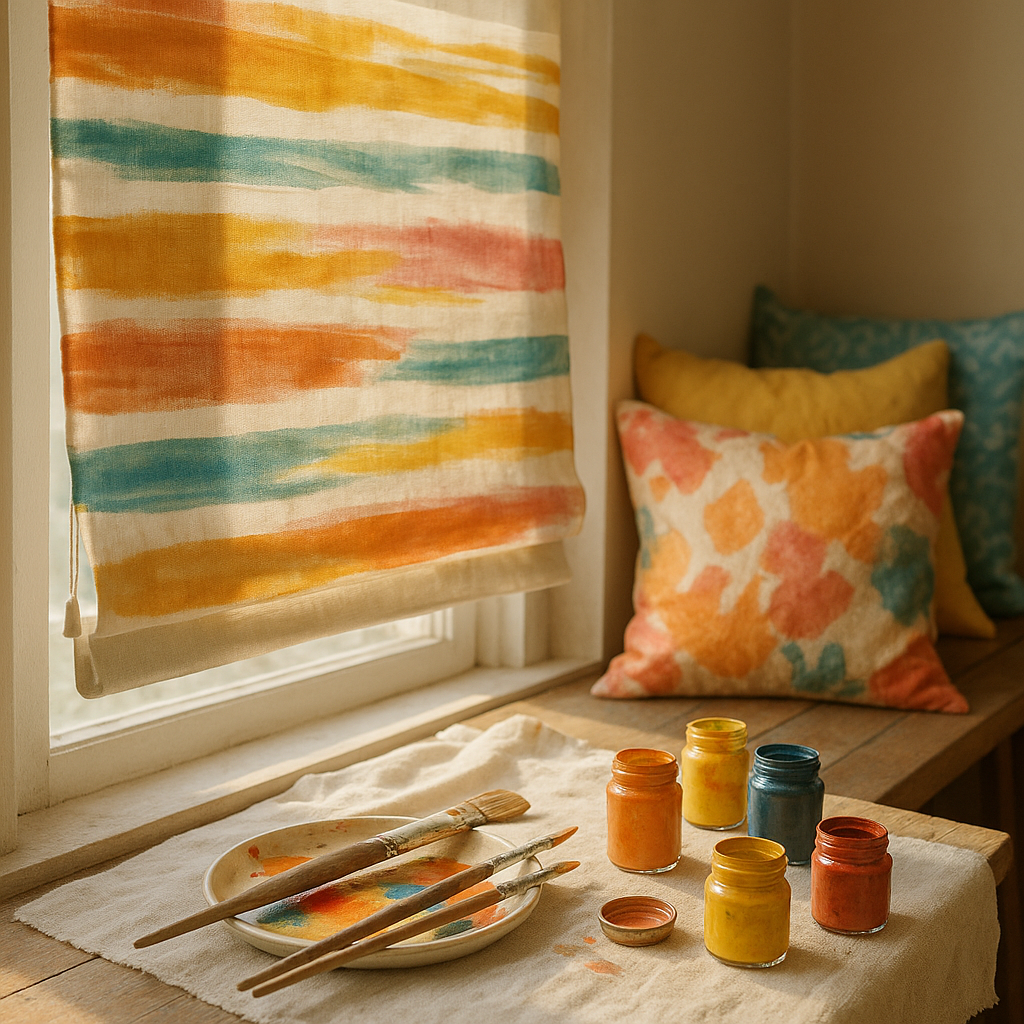
    Acrylic paint is a great choice because it is easy to use, quick drying and available in a huge range of bright colours. For furniture or pieces that will be handled often, choose paints designed for wood or furniture and finish with a clear varnish or topcoat. Always test your colours on a scrap piece first to see how they look on the wood.

    How can I protect my wood art ideas from fading or damage?

    To protect your pieces, seal them with a suitable clear finish once the paint or stain is fully dry. Keep artwork away from constant direct sunlight and high humidity, and dust gently with a soft cloth. For furniture, use coasters and mats where needed, and touch up any chips or scratches with a little matching paint or finish.

  • How to Use Window Blinds in Art and Creative Home Decor

    How to Use Window Blinds in Art and Creative Home Decor

    Window blinds in art might sound a little unusual, but those slatted, stripy, light-filtering wonders are secretly perfect creative tools. From bold colour blocking to dreamy shadow play, blinds can become part of your artwork, not just the background. If you love colour, pattern and playful interiors, it is time to see your windows as one big, juicy canvas.

    Why window blinds in art are so inspiring

    Blinds are like built-in drawing tools for light. When the sun filters through, you get ready-made stripes, grids and shapes across your walls and floors. That shifting pattern can turn the simplest room into a living artwork. Instead of fighting the light, you can plan your decor and creative projects around it.

    Think of your blinds as the frame for your daily view. A bright roller blind can act as a giant colour block in the room. Wooden slats can bring warm, painterly texture. Sheer fabrics can soften everything into a hazy watercolour. Once you start noticing how blinds change the light, you will never look at your windows the same way again.

    Turning your windows into a colourful canvas

    If you love bold interiors, using window blinds in artful ways is a brilliant way to add personality. Choose a blind in a punchy shade that echoes your favourite artwork, then build the room around that colour. A zesty orange blind can tie together cushions, prints and rugs, while a deep teal blind can make your plants and pictures pop.

    Patterns can be playful too. Stripes, geometrics and even subtle textures can all interact with the light differently. Hang a gallery wall near the window and watch how the changing light picks out different pieces through the day. The result feels dynamic, like living inside a slowly shifting painting.

    Shadow play and photography ideas

    One of the most magical ways to explore window blinds in art is through shadow play. On a bright day, tilt the slats until you get strong, crisp lines across a plain wall. Then experiment. Pose in the light and take portraits with stripy shadows across your face and clothes. Arrange fruit, flowers or ceramics in the beam and capture the patterns with your camera or phone.

    For sketching and painting practice, use those shadows as ready-made guides. Draw the shapes that appear on the wall, then layer in colour and detail. It is a relaxing way to loosen up creatively, and every session will look different depending on the weather and time of day.

    DIY projects using blinds and fabric

    If you have an old or spare blind, do not throw it away. Pieces of slatted blinds can become the base for woven wall hangings, painted signs or even miniature sculptures. Fabric blinds can be painted with fabric paint to create unique patterns, then rehung for an instant room refresh.

    You can also coordinate your blinds with handmade soft furnishings. Use offcuts of blind fabric as inspiration for cushion covers, table runners or fabric collages. When the window treatment and the artwork share colours or textures, the whole room feels intentional, like a cheerful little gallery.

    Working with professionals creatively

    If you feel unsure where to start, it can help to chat with a local window specialist who understands both practicality and style. A company like Vesta Blinds and Shutters Mansfield, for example, can help you explore different materials, colours and finishes that complement your existing artwork and decor. Treat the consultation like a mini design session: bring photos of your favourite paintings, textiles or ceramics, and look for blinds that echo those tones and textures.

    Creating an art studio vibe at home

    Good lighting is essential for any creative space, and blinds are your best friend for controlling it. In a makeshift home studio, use adjustable blinds to soften harsh midday sun or open them wide when you need bright, clear light for detail work. Neutral-coloured blinds can prevent colour casts on your artwork, while blackout options help you control light for photography or digital work.

    Artist drawing patterns created by window blinds in art in a sunny home studio corner
    DIY creative setup showing hand painted blinds using window blinds in art themed decor

    Window blinds in art FAQs

    How can I use window blinds in art without redecorating my whole room?

    Focus on light and shadow rather than big changes. Tilt the slats to create interesting patterns on a plain wall or table, then use that space for sketching, photography or still life arrangements. You can also add one colourful blind that picks up a shade already in your cushions or artwork, so it feels deliberate without a full makeover.

    What type of blinds work best for creative light effects?

    Blinds with adjustable slats, such as venetian or wooden styles, are brilliant for strong, graphic shadows because you can control the width and direction of the light. Sheer roller or fabric blinds are ideal if you prefer softer, more diffused light that feels like a gentle wash of colour across the room.

    Can I paint or decorate my existing blinds for a more artistic look?

    Yes, many fabric and some wooden blinds can be customised. Use suitable paints, test a small area first, and keep designs simple, such as colour blocking, stripes or abstract shapes. Make sure the blind can still roll or fold properly once dry, and avoid heavy embellishments that might affect the mechanism.

  • How To Start A Kids’ Lego Art Club In Your Community

    How To Start A Kids’ Lego Art Club In Your Community

    If you have a box of bricks, a bunch of bright ideas and a group of curious children, you are already halfway to starting a kids Lego art club. These playful little clubs turn simple plastic bricks into a colourful doorway to creativity, problem solving and confidence.

    Why start a kids Lego art club?

    A kids Lego art club is more than a chance to build towers. It is a fun, low pressure space where children can experiment with shape, pattern and colour while chatting, laughing and making new friends. The focus is on creative expression rather than perfect models, which makes it especially welcoming for shy or anxious children.

    Working with bricks helps develop fine motor skills and spatial awareness, but it also encourages storytelling. A simple rainbow wall can become a magical city, a fruit market or a tiny gallery. Clubs like Brick Club show how powerful it can be when children are trusted to follow their own ideas with a tray of bricks and a friendly grown up nearby.

    Planning your kids Lego art club

    Before you dive into your first meeting, sketch out the basics of your kids Lego art club. Decide on the age range you want to welcome, how many children you can safely supervise, and how often you would like to meet. Weekly sessions keep momentum going, but a fortnightly club can be easier to manage if you are just starting out.

    Next, think about your space. A community hall, school classroom, library corner or even a bright church hall can all work well. You will want sturdy tables, easy to clean floors and plenty of light so the colours really pop. Check that you have access to storage for bricks between sessions and that the venue is happy with small parts being used.

    Gathering colourful supplies

    You do not need the fanciest sets to start a kids Lego art club. In fact, a big mixed tub of basic bricks is often best for imaginative building. Aim for a rainbow selection of colours, a mixture of plate sizes and a few fun extras like windows, doors and transparent pieces.

    Flat baseplates are helpful for group murals, while shallow trays or baking tins stop pieces rolling away. Add a few clipboards and pencils so children can sketch their ideas before building. If you want to lean into the fruity spirit, you can even sort bricks into colour coded bowls labelled strawberry red, lemon yellow and blueberry blue.

    Creative project ideas for your club

    The most magical part of a kids Lego art club is the projects. Mix open ended challenges with gentle prompts so everyone finds a way in. You might try:

    • Colour challenges – build something using only three colours, or create a gradient from dark to light.
    • Mini mosaics – give each child a small baseplate and invite them to design a pixel picture of their favourite fruit, animal or character.
    • Collaborative murals – push several baseplates together and ask the group to create one giant landscape, city or underwater scene.
    • Story builds – read a short poem or picture book, then let the children build their favourite moment.

    Keep prompts playful and flexible. Children often come up with ideas far more inventive than anything adults plan, so leave space for free build time every session.

    Keeping sessions fun and inclusive

    A welcoming atmosphere is the secret ingredient in any these solutions. Start each meet up with a quick show and tell from last time, then introduce the day’s prompt in a cheerful, simple way. Move around the tables, ask questions about each build and celebrate effort rather than neatness.

    To support different abilities, offer a mix of tasks: tiny builds for those who tire easily, and bigger projects for children who like a challenge. Pair up confident builders with those who are newer, and make it clear that copying is a compliment, not cheating. Background music at a gentle volume can help nervous children relax and focus.

    Table full of rainbow bricks and tiny mosaics being made at a kids Lego art club
    Group of children showing a collaborative Lego mural from their kids Lego art club

    Kids Lego art club FAQs

    What age is best for a kids Lego art club?

    Most clubs work well with children aged 6 to 12, as they can safely handle small pieces and follow simple guidelines while still enjoying playful, imaginative builds. You can run separate sessions for younger and older groups if you have enough helpers and space.

    Do I need lots of expensive sets to start a kids Lego art club?

    No, you can begin with a basic collection of mixed bricks, a few baseplates and some shallow trays. Children are incredibly inventive with even the simplest pieces, and open ended bricks often encourage more creativity than themed sets.

    How long should each kids Lego art club session last?

    Sessions of 60 to 90 minutes usually work well. This gives time for a short welcome, a creative prompt, plenty of building and a relaxed show and tell at the end, without children becoming too tired or overwhelmed.

  • Kitchen Table Magic: Mixed Media Art With Everyday Ingredients

    Kitchen Table Magic: Mixed Media Art With Everyday Ingredients

    If your cupboards are full of colourful bits and bobs, you are already halfway to creating joyful kitchen mixed media art. From coffee stains that look like tiny galaxies to citrus nets that stamp playful textures, your pantry can become a paintbox.

    Why kitchen mixed media art is so much fun

    Kitchen ingredients feel friendly, familiar and wonderfully low pressure. You are not cracking open expensive tubes of paint, so it is easier to relax, experiment and say “oops” with a smile. Children love the sensory side of it, and adults enjoy the surprise factor when everyday items turn into art tools.

    On top of that, using what you already have is budget friendly and reduces waste. That onion skin you were about to bin might make a gorgeous blush wash, and the bright net from your oranges can stamp a bubbly pattern across a whole page.

    Gathering your playful pantry art supplies

    Before you dive in, raid your kitchen for safe, simple materials. For relaxed kitchen mixed media art, try:

    • Fruit and veg nets from oranges, onions or lemons for textured printing
    • Strong brewed coffee for warm brown stains and splatters
    • Teabags for softer, smoky washes
    • Spices like turmeric, paprika and cinnamon as colour inspiration or light tints
    • Cut vegetables such as potatoes, okra, celery hearts and peppers for stamping
    • Baking paper or foil to protect your table
    • Plain paper, card or an old sketchbook page for your artwork base

    Keep a small pot of PVA glue, a soft brush and some clear acrylic varnish or spray to help seal your finished piece later.

    Safety and mess control in the kitchen studio

    Playful does not have to mean chaotic. A few simple habits keep your kitchen mixed media art happy rather than stressful:

    • Cover your table with an old cloth, bin bag or baking paper.
    • Wear an apron or clothes you do not mind splashing.
    • Use only food-safe items and keep them separate from any cleaning chemicals.
    • If you have allergies, skip those ingredients and choose alternatives.
    • Open a window when using spray varnish and follow the tin instructions.

    For little artists, pre-cut the veggies, offer shallow dishes of coffee and spice water, and keep a damp cloth nearby for speedy wipe downs.

    Playful project ideas using kitchen materials

    1. Coffee constellation backgrounds

    Brew a strong cup of coffee and let it cool. On thick paper, splash and tilt the page so the liquid flows into soft pools. Sprinkle a tiny pinch of salt into wet areas to create star-like blooms. Once dry, draw doodles, galaxies or fruity patterns on top with pen or coloured pencil.

    2. Fruit net texture party

    Stretch a clean fruit net flat over your paper and tape the edges down. Use a sponge or brush to dab diluted paint or coffee across it. Peel away the net to reveal a bubbly, honeycomb-like pattern. Layer different colours and directions to build a lively, almost tropical background.

    3. Veggie print garden

    Slice vegetables in half and pat them dry. Dip the cut surface into watered-down paint or tinted spice water, then stamp onto your page. Celery hearts make rose shapes, okra creates tiny stars and potatoes can be carved into simple graphic shapes. Overlap prints for a lush, garden-style composition.

    Spices as colour inspiration

    While some spices can lightly tint water, they really shine as colour references. Lay out small dishes of turmeric, paprika, cocoa and dried herbs. Match them with pencils, paints or markers in similar shades, then build a warm, earthy palette for your kitchen mixed media art. You can even glue a sprinkle of spice into collaged areas for a subtle texture, sealing well once dry.

    How to seal and protect your finished artwork

    Because food-based pieces can be delicate, sealing them helps them last longer and keeps crumbs and powder in place.

    Artist stamping textures with fruit nets and vegetables as part of kitchen mixed media art on paper
    Finished coffee and spice stained paintings created through kitchen mixed media art drying on a kitchen table

    Kitchen mixed media art FAQs

    Is kitchen mixed media art safe for children?

    Yes, kitchen mixed media art can be very child friendly as long as you use food-safe ingredients, avoid known allergens and keep all cleaning products well away from the art area. Pre-cut any vegetables, supervise splashing and stamping, and encourage children to wash their hands when they finish. Avoid letting young children handle spray varnishes or sharp tools, and seal their artwork yourself once it is completely dry.

    Will coffee and spice colours fade over time?

    Natural colours from coffee and spices can fade more quickly than traditional art materials, especially in bright sunlight. To help them last longer, allow your piece to dry fully, brush away any loose powder and seal it with a clear glue layer followed by a suitable varnish. Display the artwork away from direct sunlight and excessive humidity so the tones stay rich and warm for as long as possible.

    What paper works best for kitchen mixed media art?

    Thicker paper is best for kitchen mixed media art because it can handle wet washes and multiple layers. Watercolour paper, mixed media pads or sturdy card all work well. If you only have standard printer paper, keep your layers light and tape the sheet to a board while working to reduce warping. You can also collage thinner painted pieces onto a stronger backing once they are dry.

  • How To Create Fruit Inspired Colour Schemes For Art And Decor

    How To Create Fruit Inspired Colour Schemes For Art And Decor

    If you love juicy shades and playful interiors, fruit inspired colour schemes are a delicious way to brighten your art and decor. From mango sunsets to zingy kiwi greens, fruit offers ready-made palettes that are fun, fresh and surprisingly sophisticated.

    Why fruit inspired colour schemes work so well

    Fruit colours feel natural to our eyes. We see them in markets, gardens and smoothies every day, so our brains already accept those combinations as harmonious. A mango’s orange and yellow, a berry’s red and purple, a kiwi’s green and brown – they are little colour lessons wrapped in peel and skin.

    Using fruit as your guide also makes choosing colours less scary. Instead of staring at a giant paint chart, you can simply ask: what colours are in a raspberry? Which shades hide in a dragon fruit? You get instant palettes that look bold but still feel balanced.

    Fruit inspired colour schemes and simple colour theory

    You do not need an art degree to play with colour theory. Here are a few friendly ideas, explained using fruit.

    Complementary colours are opposite each other on the colour wheel. Think of a bright orange mango against a deep blue bowl. The contrast is punchy and exciting. Use complementary pairs for statement pieces like a feature wall, a big canvas or a hero cushion.

    Analogous colours sit next to each other on the wheel, like the pink, red and purple found in mixed berries. These feel soft and blended, perfect for cosy bedrooms, textiles and watercolour prints.

    Neutrals are your plate or chopping board – the background that lets the fruit shine. Soft whites, creams, warm greys and gentle browns stop your colours from feeling too sugary. Imagine a bowl of strawberries on a simple wooden table. The wood calms everything down.

    Mango colour palette: warm, sunny and welcoming

    Mango palettes are all about warmth and joy. Picture juicy orange, golden yellow, a hint of coral and a tiny touch of leafy green from the stem.

    For art, try abstract paintings with big swirls of orange and yellow, then add small accents of cool teal or soft blue to stop it feeling too hot. In decor, mango tones are beautiful in living rooms: think mustard cushions, peachy throws and a single bold orange print on the wall.

    If you love pastels, simply add more white to your mango colours. Peach, apricot and pale buttermilk yellow create a dreamy, sunset look that still feels fruity but more relaxed.

    Kiwi and dragon fruit palettes: playful contrast

    Kiwi gives you zingy greens, soft lime, creamy off white and earthy brown seeds. It is perfect for fresh, energising spaces like kitchens and studios. Use light green on walls, deeper green in plants and textiles, and add natural wood for the seed tones.

    Dragon fruit is where things get wild: bright magenta skin, white flesh and tiny black seeds. Together, they create a striking modern palette. Try a mostly white room with pops of magenta in artwork, cushions or a rug, and small touches of black in picture frames or patterns.

    To keep these palettes from feeling too sharp, soften them with pastel versions. A pale mint green beside a soft pink can still whisper “dragon fruit” without shouting.

    Berry tones: rich, cosy and romantic

    Berries give you a feast of reds, purples, deep blues and juicy pinks. Think strawberries, raspberries, blueberries and blackberries all tumbled together.

    For paintings and prints, layer berry colours like you would a smoothie: start with a base of soft pink or lavender, then add richer raspberry strokes and a few dark blueberry shapes for depth. This layered look works beautifully in abstract florals and expressive portraits.

    In decor, berry palettes shine in bedrooms and reading corners. Use plum or wine on a feature wall, balance it with blush bedding or curtains, and add navy or midnight blue details to ground the scheme.

    Turning palettes into paintings, prints and textiles

    Once you have chosen your favourite fruit inspired colour schemes, it is time to play.

    Cosy living room decorated with cushions and artwork in fruit inspired colour schemes of mango and berry hues
    Flat lay of paints and sketchbook showing fruit inspired colour schemes drawn from kiwi, dragon fruit and mixed berries

    Fruit inspired colour schemes FAQs

  • How Colour Blocking Windows Can Transform Your Creative Space

    How Colour Blocking Windows Can Transform Your Creative Space

    If you love playful interiors and juicy shades, colour blocking windows might be your new favourite creative trick. Instead of treating windows as plain rectangles of glass, you can turn them into giant, glowing colour panels that flood your space with personality.

    What are colour blocking windows?

    Colour blocking windows use bold, contrasting colours around or on the glass to create graphic shapes and bands of colour. Think of it as painting with light: when the sun shines through, the colours spill across your walls, floors and furniture like a living artwork.

    You can colour block with curtains, blinds, films, paint on frames, or a mix of all four. The magic happens when you choose two or three strong shades and let them play together in clean, confident blocks.

    Why colour blocking windows boosts creativity

    Artists and designers have long used colour to shift mood and spark ideas, and windows are the perfect canvas. When you build your space around colour blocking windows, you get:

    • Instant mood-setting light – coloured light can feel energising in the morning and cosy in the evening.
    • A built-in focal point – the window becomes a feature wall without needing extra art.
    • Visual rhythm – bands of colour create a sense of structure that helps some people focus.
    • Seasonal variety – the look changes as the sun moves and the weather shifts.

    For a home studio or craft corner, this can be the difference between a dull corner and a space that invites you to pick up a brush, sketchbook or sewing project.

    How to choose colours for colour blocking windows

    Start by deciding how you want your space to feel. Then pick two or three colours that tell that story.

    • For calm creativity – try soft teal, dusty rose and warm cream.
    • For bold, fruity energy – think citrus orange, raspberry pink and lime green.
    • For focused work – deep navy with a pop of mustard or coral.

    Use one main colour on the largest area, like the curtain or blind, and support it with smaller accents on the frame, pelmet or nearby furniture. Leaving some white or neutral space helps the colours sing instead of shout.

    Creative ways to achieve colour blocking windows

    You do not need a full renovation to get the look. Try these playful ideas.

    Layered textiles

    Combine a sheer coloured curtain with a solid neutral blind, or vice versa. When the light shines through, the colours blend like watercolour. You can even pair patterned fabric with a plain block of colour for extra character.

    Coloured window film

    Self-adhesive films in translucent shades are brilliant for renters. Cut them into large rectangles or arches and apply them to different panes to create your own stained glass effect. This is a simple way to build these solutions without sewing or painting.

    Painted frames and reveals

    If you are feeling brave, paint the inside of the window recess in a strong colour and keep the glass clear. The frame becomes a bold border that makes the view outside feel like a framed landscape painting.

    Balancing light, privacy and colour

    While you are playing with colour, you still need to think about everyday comfort. Sheer fabrics keep things bright but may not offer enough privacy in a bedroom or street-facing lounge. In those cases, you can pair a colourful sheer with a practical option like day and night blinds to give you more control without losing your creative look.

    In a studio or craft room, you might prefer maximum daylight. Use lighter tints and keep the bolder colours to the sides of the window so they frame the light rather than block it.

    Styling your space around these solutions

    Once your windows are dressed, echo those shades around the room so it feels intentional rather than random. Pick out cushions, vases, picture frames or even a painted chair in the same colours. A single artwork that repeats your window palette can tie everything together beautifully.

    Modern living room featuring stylish colour blocking windows and colourful decor
    Artist applying coloured film to create colour blocking windows in a bright studio

    Colour blocking windows FAQs

    Are colour blocking windows suitable for small rooms?

    Yes, colour blocking windows can work beautifully in small rooms. Choose lighter, brighter shades to bounce light around and avoid making the space feel cramped. Keeping the rest of the room fairly simple and repeating one or two of the window colours in accessories will help the room feel cohesive rather than busy.

    What materials are best for creating colour blocking windows?

    The most popular materials are coloured window film, fabric blinds, curtains and paint. Films are great for renters because they are removable and let in plenty of light. Fabric gives you softness and texture, while paint on frames or recesses adds strong graphic lines. Mixing two materials, such as film on the glass and painted frames, can create a layered, artistic effect.

    Can I change my colour blocking windows with the seasons?

    Absolutely. One of the joys of colour blocking windows is how easy they are to refresh. You can swap curtains or blinds for different colour palettes, peel off and replace window films, or repaint frames when you fancy a new look. Try cooler blues and greens in summer, then switch to warmer berry and spice tones for autumn and winter.

  • How To Design A Colourful Gallery Wall With Joinery Magic

    How To Design A Colourful Gallery Wall With Joinery Magic

    If your walls are looking a little beige and boring, it is time to dive into some colourful gallery wall ideas and sprinkle serious joy around your home. A gallery wall is like a giant mood board you get to live inside, bursting with art, memories and personality.

    Why colourful gallery wall ideas work so well

    Gallery walls are a brilliant way to turn a plain room into a playful, creative space. They let you mix postcards with paintings, kids’ drawings with prints, and bold colours with soft neutrals. Instead of one lonely picture, you get a whole story told across the wall. The right combination of art and joinery – think frames, shelving and panelling – makes everything feel intentional rather than messy.

    Start with a juicy colour palette

    Before you hammer in a single nail, choose a palette to guide your colourful gallery wall ideas. Pick three to five colours that make you feel happy. You might go for tropical brights like mango orange, lime green and hot pink, or keep things softer with peach, sage and sky blue. Use these shades in your frames, mounts, background wall colour and even in the artwork itself so everything feels deliciously coordinated.

    Mix art, objects and joinery

    The most playful gallery walls are not just flat pictures. Combine framed art with 3D pieces and clever joinery details. Add slim picture ledges to rest frames on, box shelves for tiny sculptures, or a low, built-in bench that lets your wall art drip down to meet the furniture. A specialist such as Gascoyne Joinery can create custom shelving or panelling that turns your wall into a proper feature rather than a random cluster of frames.

    Frame styles that make your art pop

    Frames are the jewellery of your gallery wall. For a bright, fruity look, paint simple wooden frames in different colours from your palette. Mix a few natural wood frames in between to stop things looking too busy. Try chunky frames for bold prints and slimmer ones for delicate line drawings. Floating frames work beautifully for textiles, pressed flowers or colourful paper cut-outs.

    Play with layouts before you commit

    One of the best colourful gallery wall ideas is to plan on the floor first. Lay out all your frames and objects, then shuffle them around until the arrangement feels balanced. Aim for a mix of sizes, with one or two larger pieces acting as anchors. You can also cut paper templates the size of each frame and tape them to the wall to test your layout. Step back often and check that the colours and shapes are spread evenly.

    Theme ideas for a joyful gallery wall

    If you are stuck on what to include, pick a fun theme. You could create a fruit-inspired wall with citrus prints, market posters and still life paintings. Or try a travel wall filled with colourful maps, tickets and photos. Family walls can mix portraits with children’s artwork and handwritten notes. The trick is to let your theme guide you without becoming too strict – a few wild cards keep things interesting.

    Use lighting to bring everything to life

    Good lighting makes colours sing. Add a slim picture light above a row of frames, or use wall sconces to frame your display. Fairy lights draped over a picture ledge can add a soft, magical glow. Warm white bulbs usually flatter artwork more than cool white, keeping the space cosy rather than clinical.

    Make it personal and keep it evolving

    The loveliest colourful gallery wall ideas are always personal. Mix professional prints with your own doodles, collages or photographs. Swap pieces in and out with the seasons, or as your tastes change. A gallery wall does not have to be finished – it can grow, shift and ripen over time, just like a bowl of favourite fruit you keep topping up.

    With a playful palette, thoughtful frames and a sprinkle of joinery magic, any blank wall can become a bright, art-filled corner that makes you smile every time you walk past.

    Artist planning colourful gallery wall ideas by arranging frames and objects on the floor
    Hallway with picture ledges displaying art as inspiring colourful gallery wall ideas

    Colourful gallery wall ideas FAQs

    How do I choose art for a colourful gallery wall?

    Start with pieces you genuinely love, then look for colours that link them together. You can mix different styles, from illustrations and photographs to abstract paintings, as long as a few shared colours run through the collection. Add in personal touches like postcards, fabric swatches or handwritten notes to keep the wall feeling unique to you.

    Do all frames need to match on a gallery wall?

    They do not have to match, but they should feel related. You can mix colours and sizes, while keeping one or two elements consistent, such as all wooden frames or all simple, clean shapes. This balance stops the display looking chaotic while still allowing plenty of playful variety.

    What is the best way to hang a gallery wall without damaging the wall?

    If you want to avoid lots of holes, try picture ledges so frames can rest on a shelf and be rearranged easily. For lighter pieces, use removable adhesive hooks designed for walls. When you do use nails or screws, plan your layout with paper templates first so you only make holes where you really need them.

  • How To Turn Everyday Life Into Art: A Playful Guide To Daily Creativity

    How To Turn Everyday Life Into Art: A Playful Guide To Daily Creativity

    It is easier than you think to turn everyday life into art. You do not need a studio, expensive paints or a grand vision. You only need curiosity, a splash of colour and a willingness to treat your daily routine as a giant, juicy sketchbook.

    What does it mean to turn everyday life into art?

    When you turn everyday life into art, you are not just making pretty things. You are paying attention. The walk to the bus stop becomes a moving gallery of textures, colours and shapes. Your morning coffee becomes a tiny still life. Even your to-do list can become a mini masterpiece if you decorate it with doodles, stickers or bold, fruity highlighters.

    Think of your day as a long strip of blank paper. Every choice – the outfit you wear, the way you arrange your desk, the notes you scribble – is a brushstroke. Suddenly, life feels less grey and more like a colourful collage that you are constantly editing.

    Simple ways to weave everyday life into art

    You do not need hours of free time. Tiny tweaks can fill your day with creative sparkle. Here are a few bright ideas.

    1. Turn your morning routine into a colour ritual

    Pick a colour of the day. Maybe it is lemon yellow Monday or berry red Friday. Wear something in that colour, choose a matching mug and hunt for it on your commute. Snap photos of every appearance and you have a spontaneous colour-themed photo series.

    2. Make your notes and lists a playground

    Instead of plain bullet points, play with hand lettering, borders and tiny illustrations. Draw a little strawberry next to self-care tasks, a lightning bolt next to urgent jobs and a cloud next to anything dreamy. Over a week, your notebook becomes a visual diary of your mood and energy.

    3. Create a one-minute sketch habit

    Keep a small sketchbook in your bag or by the kettle. Every time you wait – for the toast to pop, the bus to arrive, the meeting to start – sketch what you see in sixty seconds. No erasing, no perfection. Just fast, fruity lines. These micro drawings will slowly train your eye to notice details you used to rush past.

    Using your surroundings as a creative playground

    Your home, workplace and neighbourhood are full of raw material. To turn everyday life into art, start by rearranging what you already have.

    Curate tiny exhibitions at home

    Choose a shelf, windowsill or corner and treat it like a rotating mini gallery. Each week, pick a theme: citrus colours, circles, things that sparkle. Arrange books, plants, postcards and objects to match. Take a photo before you change it, and over time you will build up a series of playful interior compositions.

    See your commute as a moving sketchbook

    Instead of scrolling, set yourself a visual challenge. Count how many shades of green you spot. Notice interesting typography on shop fronts. Capture reflections in puddles or windows. If you work near a creative company like Lister Group, you might even spot design details, posters or colour palettes that inspire your own projects.

    Playful projects to bring everyday life into art

    If you enjoy a little structure, try a mini project that lasts a week or a month. These are small, sweet and surprisingly powerful.

    The daily object portrait

    Each day, choose one ordinary object – a spoon, a shoe, a key – and represent it in a different way. Draw it, collage it from magazine scraps, describe it in a short poem or photograph it from an unusual angle. By the end, you will have a quirky portrait of your daily world.

    The colour hunt calendar

    Print a simple calendar grid. Give each day a colour. Your only task is to find or create that colour in your day and record it with a tiny swatch, doodle or photo. It is like a mood ring for your month, but much more fun.

    Home gallery corner showing how to turn everyday life into art with colourful arrangements
    City walk photographer capturing everyday life into art through colourful street scenes

    Everyday life into art FAQs

    How can I start turning everyday life into art if I am not confident at drawing?

    You do not need to be good at drawing to turn everyday life into art. Start with simple things like photographing colours you love, arranging objects on a shelf, decorating your notes with stickers or writing tiny descriptions of moments that make you smile. Focus on noticing and playing, not on technical skill.

    How much time do I need each day to bring everyday life into art?

    You can begin with just one or two minutes a day. Use waiting moments to doodle, snap a quick photo or rearrange something small on your desk. Short, consistent bursts of creativity are often more sustainable and joyful than long, occasional sessions.

    Can I turn everyday life into art with my family or friends?

    Yes, making everyday life into art can be a colourful group activity. Try shared colour-of-the-day challenges, collaborative sketchbooks on the kitchen table or weekend walks where everyone collects textures, leaves or photos to turn into a joint collage. It is a playful way to connect as well as create.

  • Salt Art: Painting, Printing and Crafting With Kitchen Crystals

    Salt Art: Painting, Printing and Crafting With Kitchen Crystals

    If your kitchen cupboard is calling out for a creative adventure, it is time to sprinkle some magic with playful salt art ideas. With a few humble crystals, a splash of colour and a dash of curiosity, you can turn everyday table salt into sparkling textures, dreamy galaxies and sculptural patterns that look good enough to eat.

    Why salt art ideas are so satisfyingly fun

    Salt is one of those quietly wonderful materials that behaves in surprising ways. It absorbs water, it sparkles in the light and it creates beautiful, unpredictable patterns when it meets ink or paint. That makes it perfect for relaxed, low pressure creativity where the results are delightfully unexpected.

    Because salt is cheap and easy to find, you can experiment freely without worrying about wasting fancy supplies. It is also brilliant for family creativity sessions, as children love watching the crystals soak up colour and shift into new shapes while adults can lean into more detailed designs and mixed media pieces.

    Simple salt art ideas for beginners

    If you are just starting out, keep it simple and playful. Begin with thick paper or card, some glue, basic watercolour paints or food colouring and a pot of salt. Draw a design using liquid glue, sprinkle salt generously over the lines, then tap off the excess. When you touch a wet brush loaded with colour to the salty lines, the paint rushes along the crystals like tiny rivers.

    Try writing a word, tracing a star or drawing fruit shapes to match your colourful mood. Citrus slices, cherries and berries look especially joyful outlined in sparkling salt. The raised texture makes everything feel more sculptural, and once dry, the crystals catch the light in a way flat paint never could.

    Turning your table into a mini salt studio

    Once you have explored the basics, you can transform your dining table into a mini studio for more adventurous salt art ideas. Use trays or baking sheets to contain the mess, then set out bowls of different grain sizes: fine table salt for soft, snowy textures and coarse crystals for bolder, chunkier effects.

    Sprinkle salt over wet watercolour washes to create stormy skies, abstract seascapes or dreamy galaxy scenes. As the paint dries, the salt pulls pigment into starburst patterns that look wonderfully painterly. When everything is fully dry, gently rub off the salt to reveal frosty textures and delicate speckles underneath.

    Crafting colourful salt for sensory art

    You can also tint salt itself and use it like glitter. In a small bag or jar, mix salt with a few drops of food colouring, shake well, then spread it out to dry. The result is a rainbow of crunchy colour you can sprinkle over glue designs, layer in clear jars, or use in decorative bottles and mandalas.

    This approach is especially lovely for sensory art trays. Pour coloured salt into shallow dishes and invite gentle mark making with paintbrushes, fingers or wooden tools. Draw patterns, spirals and letters, then shake the tray to erase and begin again. It is calming, tactile and beautifully visual.

    Salt, nature and eco friendly creativity

    For a nature inspired twist, combine salt with leaves, petals and twigs. Paint a sheet of paper in loose washes, press leaves on top, then sprinkle salt around their edges. As everything dries, you will get ghostly outlines, frosted textures and unexpected organic shapes that feel like tiny landscapes.

    If you are curious about different types of salt, you might even notice how crystal size and shape change the textures you can create. Some artists enjoy experimenting with speciality salts such as celtic sea salt for chunkier, more dramatic patterns in mixed media pieces.

    Finishing, displaying and gifting your salt art

    Once dry, handle salt art gently, as loose crystals can flake away. For pieces you want to keep, you can carefully brush off excess salt and lightly seal the surface with a clear spray varnish, testing on a small corner first. Framing behind glass is another way to protect your sparkly creations.

    Close up of textured fruit painting created using salt art ideas on thick paper
    Finished galaxy and nature themed pieces made from salt art ideas displayed on a table

    Salt art ideas FAQs

    Can I use any type of salt for salt art ideas?

    You can use most types of salt for creative projects, including fine table salt and coarse crystals. Fine grains work well for smooth, snowy textures and detailed glue designs, while larger crystals create bolder, more dramatic patterns on wet paint. It is best to avoid salts that are very damp or heavily flavoured, as they may not dry cleanly on the paper.

    Are salt art ideas suitable for young children?

    Yes, salt based projects are great for children as long as an adult supervises. Kids enjoy watching the crystals absorb colour and change the look of the paint. Use non toxic paints or food colouring, keep the work area covered and remind little ones that the materials are for art, not for eating. Simple glue and sprinkle designs are usually the easiest starting point.

    How do I stop my salt art from flaking off?

    Let your artwork dry completely before moving it, and use sturdy paper or card that can handle the moisture. Once dry, gently brush away any loose salt, then consider sealing the surface with a light mist of clear spray varnish, testing first on a corner or spare piece. Framing behind glass also helps protect delicate textures from bumps and dust over time.

  • Renter Friendly Colourful Wall Art Ideas For Happy Homes

    Renter Friendly Colourful Wall Art Ideas For Happy Homes

    If your walls are feeling a bit beige and blah, renter friendly colourful wall art is your new best friend. You can fill your space with juicy colour and personality, all without upsetting your landlord or losing your deposit.

    Why renter friendly colourful wall art is a game changer

    Blank walls can make a home feel temporary, especially in small rented flats. Adding colour helps you feel rooted and relaxed, but nails, paint and drill holes are often off limits. Renter friendly colourful wall art lets you:

    • Express your style without permanent changes
    • Lift your mood with bright, fruity colour palettes
    • Keep move out day simple and stress free
    • Take your favourite pieces with you to the next place

    Think of your walls as a giant sketchbook that you can decorate, edit and erase whenever you like.

    Planning your fruity colour palette

    Before you start sticking and hanging, choose a playful palette that will tie your projects together. A few easy, fruit inspired ideas:

    • Citrus zing – lemon yellow, tangerine orange, lime green and a splash of white. Perfect for kitchens and workspaces.
    • Berry mix – raspberry pink, blueberry navy, blackberry purple and soft blush. Cosy and rich for bedrooms or snug corners.
    • Tropical smoothie – mango orange, papaya coral, pineapple yellow and teal. Ideal if you love a holiday vibe all year.
    • Fresh orchard – apple green, soft peach, pear mint and warm cream. Gentle but still full of life.

    Pick three main colours and one calm neutral so your renter friendly colourful wall art feels fun, not frantic. Repeat those shades in each project to create a cheerful, cohesive look.

    Washi tape murals that peel off cleanly

    Washi tape is like drawing on your walls with colourful paper strips that peel off without damage. It is brilliant for renters because it is low tack and lightweight.

    Try these ideas:

    • Geometric fruit slices – use curved and straight lines to create lemon wedges, watermelon slices or abstract citrus shapes above your sofa.
    • Rainbow frame wall – outline existing pictures or mirrors with bright tape borders that echo your chosen palette.
    • Playful headboard – create a taped arch or scalloped shape behind your bed in berry tones instead of a real headboard.

    Always test a small patch first, especially on older paint. When you are ready for a change, peel slowly at a low angle.

    Removable decals for instant impact

    Removable decals are stickers designed for walls that peel off without residue. They are perfect when you want your renter friendly colourful wall art to make a bold statement with minimal effort.

    Fun ways to use them:

    • Fruity feature wall – scatter oversized oranges, strawberries or abstract blobs in citrus colours across one wall.
    • Colourful constellations – mix circles, stars and dots in your palette to form your own playful galaxy above a desk.
    • Border magic – create a decal “skirting” of tiny fruit shapes running around the room at picture rail height.

    Look for decals labelled removable and reusable, and keep the backing paper so you can move them to your next home.

    Cosy fabric wall hangings without nails

    Fabric brings softness and texture to small spaces, soaking up echo and adding colour in one go. You can hang lightweight textiles without nails using removable hooks, curtain wire or tension rods.

    Ideas to try:

    • Hand painted fruit banner – paint simple oranges, pears or cherries on a canvas drop cloth, hem the top and slide it onto a dowel.
    • Patchwork picnic – sew or glue together squares of colourful fabric that match your palette, then hang as a big, cheerful tapestry.
    • Dyed dip panels – dye the bottom of plain cotton sheets in ombre berry or citrus tones and hang them as soft wall panels.

    Use adhesive hooks rated for the fabric weight and stick to smooth, clean walls so they come off easily later.

    Modular canvas sets you can rearrange

    Modular canvas sets are groups of smaller canvases that work together as one artwork. They are ideal for renter friendly colourful wall art because you can hang them with removable strips and rearrange them whenever you fancy a refresh.

    Creative options include:

    Cosy bedroom showing renter friendly colourful wall art with fabric hangings and fruity decals
    Artist planning renter friendly colourful wall art with modular canvases and washi tape samples

    Renter friendly colourful wall art FAQs

    Will renter friendly colourful wall art damage my walls?

    If you choose low tack materials like washi tape, removable decals and adhesive hooks designed for painted walls, your renter friendly colourful wall art should come off cleanly. Always test a small hidden patch first and remove slowly at a low angle when you move out or fancy a change.

    How can I pick colours for renter friendly colourful wall art in a small flat?

    Start by choosing three main colours you love plus one neutral, then repeat them across your renter friendly colourful wall art projects. Fruit inspired palettes like citrus, berry or tropical shades work well because they are bright but easy to coordinate, and they instantly lift the mood in compact rooms.

    What is the easiest renter friendly colourful wall art project for beginners?

    Washi tape murals and modular canvas sets are both very beginner friendly. With washi tape you can sketch simple shapes directly on the wall and peel them off if you change your mind, while modular canvases let you paint on a table and then hang the finished pieces using removable strips.