There is something wonderfully satisfying about sitting down with a pencil, a brush, and a plump, ripe piece of fruit and attempting to capture every curve, shadow, and blush of colour on paper. Botanical illustration fruit watercolour for beginners is one of the most rewarding creative journeys you can take, combining close observation with the gentle, luminous quality that only watercolour can deliver. Whether you are a complete newcomer or someone who has dabbled with paints before, this guide will walk you through every stage of the process in a way that feels joyful rather than daunting.
Before you even pick up a brush, it helps to understand what makes botanical illustration different from loose, impressionistic painting. Traditional botanical illustration aims for accuracy and clarity, celebrating the actual structure of a subject rather than just its mood. That said, as a beginner you absolutely do not need to produce museum-quality scientific plates. The goal is to look carefully, enjoy the process, and develop your eye over time.
Choosing Your Fruit and Setting Up Your Workspace
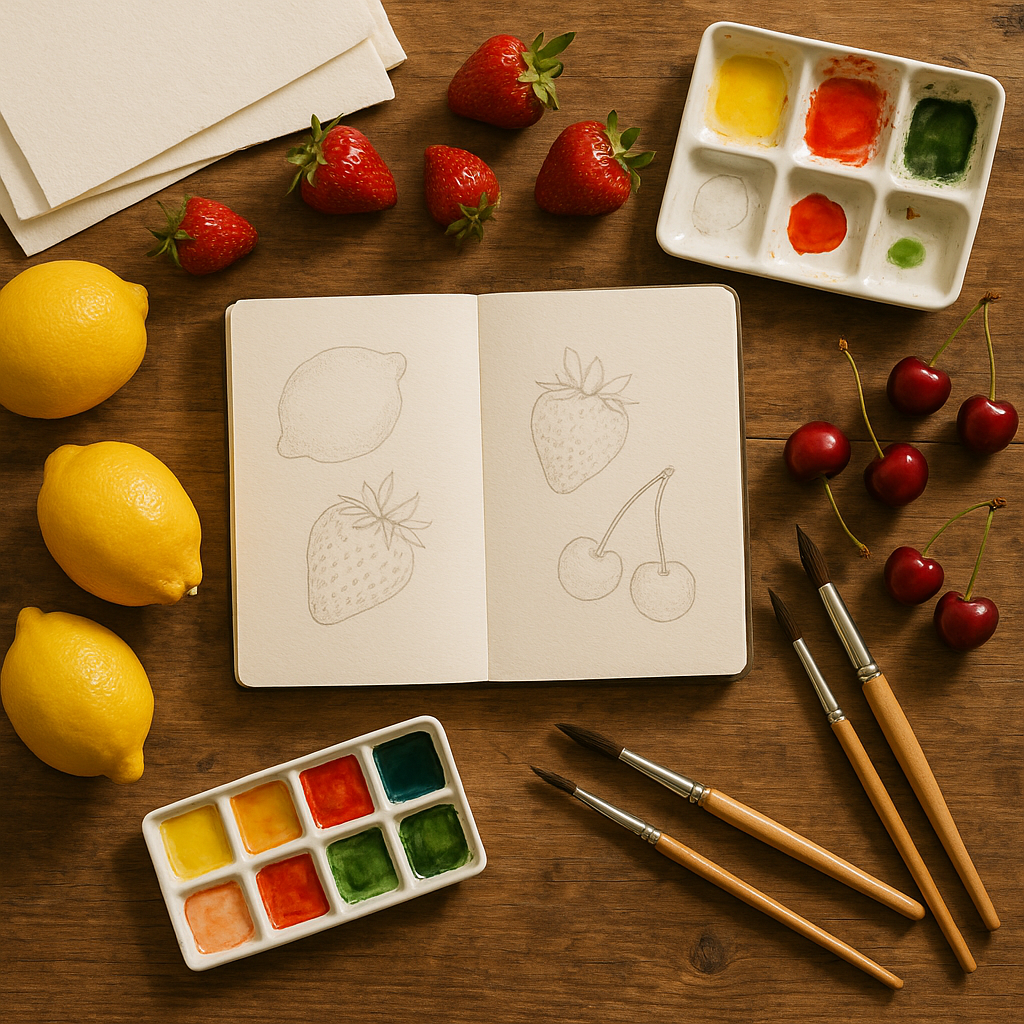
Start with fruit that has clear, readable shapes and interesting colour transitions. A lemon is brilliant for beginners because its elliptical form is simple and its textured skin creates lovely tonal variation. A halved strawberry, a cluster of grapes, or a single cherry on a stalk are equally wonderful starting points. Avoid anything too complex at first, such as a pineapple, which can overwhelm you with detail before you have found your rhythm.
Set your fruit on a plain white surface near a natural light source coming from one consistent direction. This single light source will define your highlights and shadows clearly, which is essential for creating the three-dimensional look that makes botanical illustration so striking. Have a small piece of white cartridge paper nearby to test your colours before they touch your good watercolour paper. Cold-pressed watercolour paper at around 300gsm is ideal because it handles multiple washes without buckling or tearing.
Step One: Pencil Sketching Your Fruit
Lightly sketch your fruit using a sharp HB or 2H pencil. The word lightly cannot be stressed enough here. Heavy pencil lines will show through transparent watercolour washes and disrupt the clean, glowing finish that is the hallmark of the style. Begin with the overall silhouette, checking proportions by holding your pencil up to measure the fruit in front of you. Then add key internal details: the indent at the top of an apple, the dimples on an orange, the creases where a peach splits into two lobes.
Mark in the position of your highlight with a very faint dot or circle. This is the brightest point where light hits the fruit directly, and it is the one area you will protect by leaving the white paper unpainted. Many beginners forget this and then struggle to reclaim lost whites later. You can use masking fluid if you prefer, but simply being mindful of that area as you paint works just as well once you are familiar with the process.
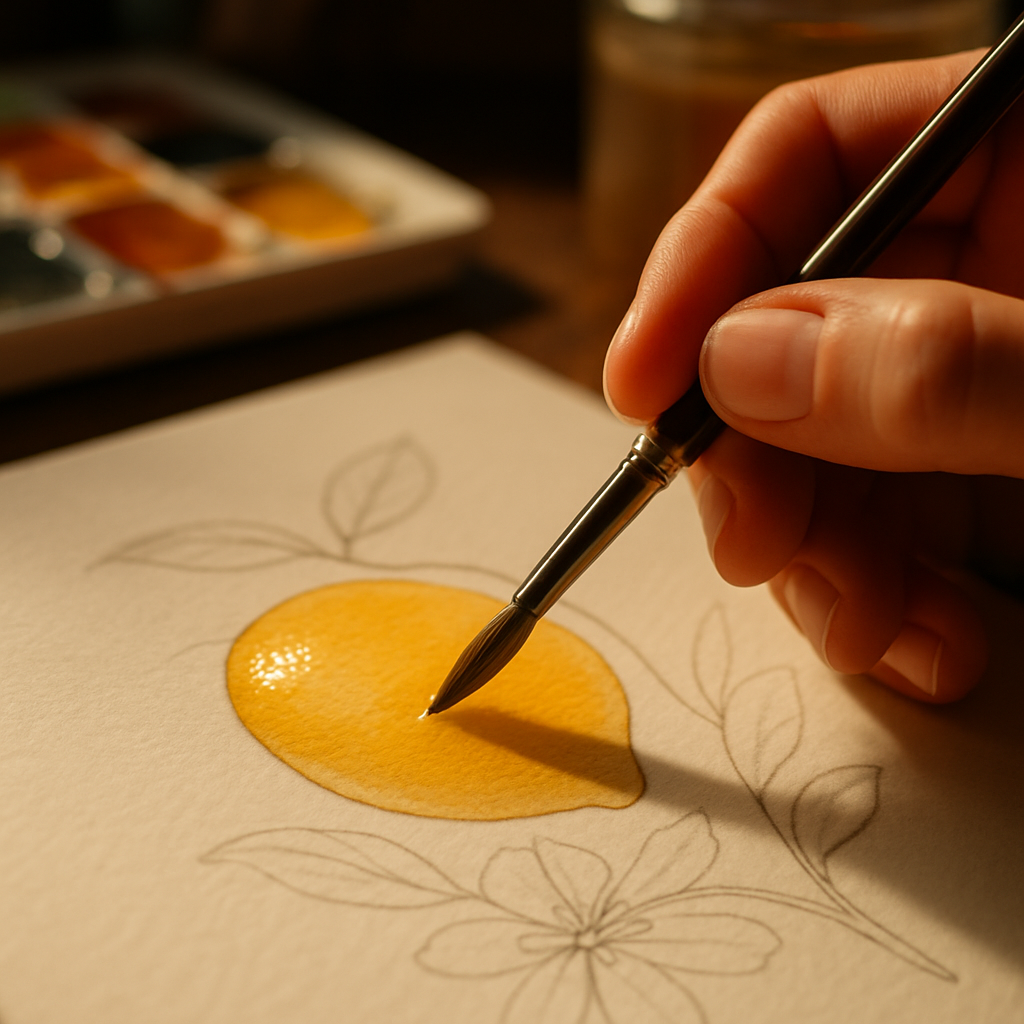
Step Two: Layering Watercolour Washes
This is where botanical illustration fruit watercolour begins to come alive. Watercolour works by building luminosity through transparent layers rather than applying one thick coat of opaque paint. Mix a very pale, watery version of your fruit’s base colour and apply it across the whole fruit in one smooth wash, leaving your highlight area untouched. Let this dry completely before adding a second wash. Patience here is not optional; painting into a wet layer creates uncontrolled blooms that can ruin your careful work.
Once your first wash is dry, mix a slightly deeper version of your colour and apply it to the shadow areas of the fruit. On a lemon, this might be the underside and the area closest to the stalk. On a strawberry, it is the deeper recesses between the seed dimples and the area curving away from the light. Keep your brushstrokes smooth and confident. Tentative, scratchy marks create a muddy finish. A round brush in sizes 4 and 6 will handle most of this layering work beautifully.
Continue building washes, working from light to dark, until the form feels convincingly round and solid. Most fruit will require three to five layers to achieve the depth you are looking for. Each layer should be fully dry before the next goes on. A hairdryer on a low setting can speed this up if you are impatient, though allowing natural drying gives you slightly more control over soft edges.
Step Three: Adding Fine Detail and Texture
Detail is what elevates a pleasant painting into a true botanical illustration. Switch to a smaller brush, a size 1 or 000, and begin adding the specific surface characteristics of your fruit. The tiny raised dots on a strawberry, the fine network of veins on a grape, the rough pitted texture of a lemon skin: these small marks signal to the viewer that you have really looked at your subject. Use a concentrated mix of your darkest tone rather than a fully saturated black, which can look harsh and flat.
Add cast shadows beneath your fruit using a cool grey or a neutral mix of complementary colours rather than black. A cool blue-grey or violet shadow grounds the fruit on its surface and makes the whole composition feel real. You can soften the outer edge of the shadow by dampening the paper slightly before adding paint, allowing it to bleed naturally into a gentle gradient.
Common Mistakes Beginners Make and How to Avoid Them
The most frequent error in botanical illustration fruit watercolour work for beginners is rushing the drying time between layers. The second is using too much paint and not enough water in early washes, resulting in flat, opaque coverage instead of glowing transparency. A third is neglecting to mix enough of a colour before starting a wash, forcing a mid-stroke remix that creates visible lines in the finished piece. Mix generously, work slowly, and trust that each dried layer is adding exactly the depth you need.
Building your skills through botanical illustration is one of the most joyful creative habits you can develop. Every piece of fruit becomes a miniature world of colour, light, and texture waiting to be explored. Keep your first attempts, no matter how imperfect they seem, because looking back at them in a few months will show you just how quickly your eye and hand learn to work together.
Frequently Asked Questions
What watercolour paints are best for botanical illustration fruit painting as a beginner?
Student-grade watercolour sets from brands such as Winsor and Newton Cotman or Daler-Rowney Aquafine are excellent starting points, offering good transparency and a wide colour range at an accessible price. As you progress, investing in a small selection of artist-grade single pigment colours, particularly yellows, reds, and greens, will give you cleaner mixes and more vibrant results. Avoid sets with too many pre-mixed earth tones, as these can quickly muddy the fresh, luminous quality that fruit illustration requires.
How long does it take to complete one botanical illustration fruit watercolour painting?
A simple single-fruit study, such as a lemon or an apple, typically takes between two and four hours for a beginner when drying time between layers is included. More complex subjects with multiple pieces of fruit or cut sections showing seeds and pulp can take six hours or more spread across several sessions. Rushing the drying stages is the most common cause of disappointing results, so it is worth working on two small paintings simultaneously and alternating between them.
Do I need drawing skills before I start botanical illustration?
Basic pencil sketching helps, but you do not need advanced drawing ability to begin. Starting with simple geometric fruit shapes and practising proportion exercises, such as sketching the same lemon ten times, builds confidence quickly. Many botanical illustrators improve their drawing skills through the illustration process itself rather than taking separate drawing classes beforehand.
What paper should beginners use for fruit watercolour botanical illustration?
Cold-pressed watercolour paper at 300gsm is the standard recommendation for botanical illustration because it accepts multiple wet washes without warping and has a gentle texture that holds paint well. Brands such as Fabriano Artistico or Saunders Waterford are widely trusted. Avoid thin paper under 200gsm, as it will buckle badly under wet washes, making smooth, even layering extremely difficult.
Can I do botanical illustration fruit watercolour paintings from photographs instead of real fruit?
Photographs can work as a reference in a pinch, but painting from real fruit in front of you is strongly recommended, especially for beginners. Real fruit allows you to observe how light shifts as you move around it, feel the actual texture, and notice colour nuances that a photograph compresses or loses entirely. If your fruit is likely to wilt or rot, take several good-quality photos under consistent lighting as a backup reference to keep beside your fresh subject.
Leave a Reply